15 Winter Nail Ideas for Light Skin That Glow in the Cold
Winter outfits may get all the attention, but you know what really steals the show? Your nails. Think about it, every time you grab a latte, snap a pic, or pull on those cozy gloves, your nails are front and center.
So why not make them glow? From frosty blues to candy-cane stripes, these 15 winter nail ideas for light skin are here to turn your hands into the main character. Ready to find your new favorite?
#1. Frost-Kissed Ombre Nail Glow
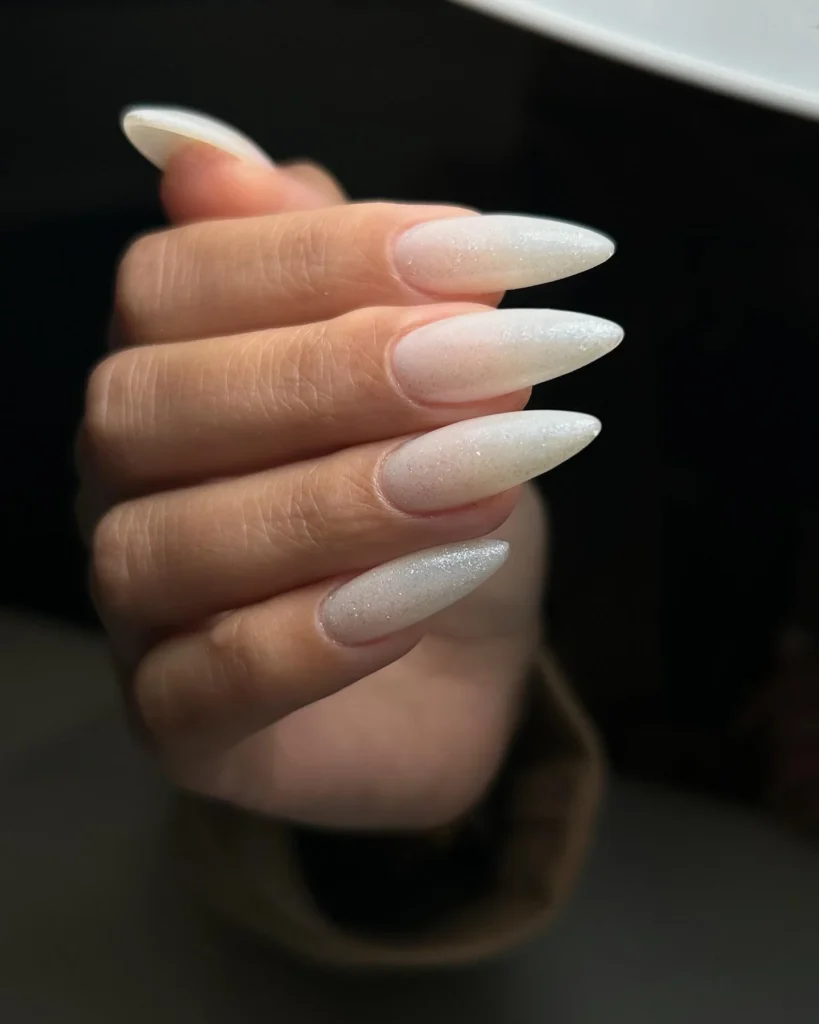
A soft snowfall vibe lands right on your fingertips. The milky-to-icy ombré catches the light with a whisper of shimmer, like fresh powder under a streetlamp.
How To Create This Design
- Prep and apply a thin rubber base coat.
- Brush on a sheer milky white gel. Cure.
- Using a sponge, dab white gel at the tips and fade toward the center for the ombré. Cure.
- Dust a fine micro-glitter (pearlescent) over the tips.
- Seal with a glossy top coat and cure; finish with cuticle oil.
Pro Tip: Use a makeup sponge in tiny taps instead of swipes, tapping builds a seamless, soft-focus fade.
#2. Winter Mocha Aura Nail Mix
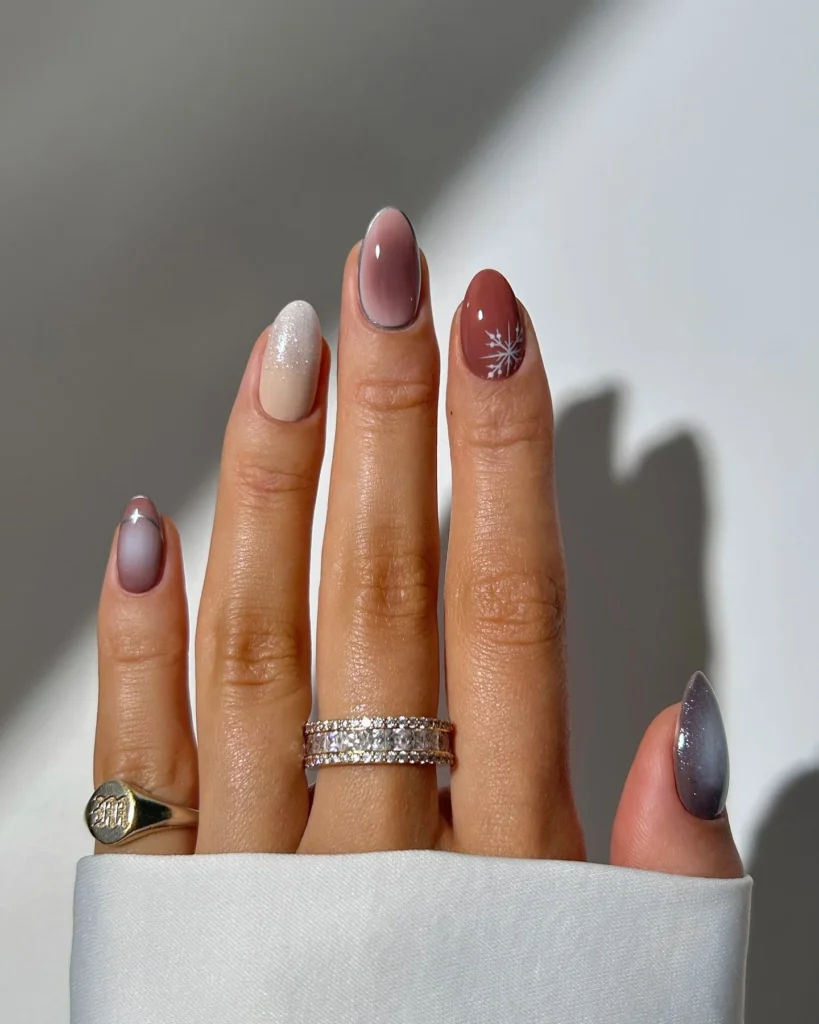
Think cozy latte meets winter stargaze. A rosy “aura” nail, a sugar-snow accent, and cat-eye shimmer sit beside a cocoa nail stamped with a delicate snowflake. The mix-and-match palette flatters light skin without washing it out—warm, dimensional, and very chic.
How To Create This Design
- Apply base coat; cure.
- For aura nails, lay a sheer nude, then airbrush or softly sponge mauve at the center.
- Create a sugar nail: paint off-white gel, sprinkle fine white glitter before curing.
- For cat-eye nails, use magnetic gray gel and activate with a magnet before curing.
- Paint a cocoa nail and add a thin white snowflake using a liner brush.
- Top coat everything (matte or glossy to taste) and cure.
Pro Tip: Keep finishes varied (sugar, cat-eye, glossy) for depth, variety makes the set feel designer.
#3. Latte Swirl Neutral Nail Art

Neutral doesn’t mean boring. Cream, mocha, and cappuccino swirls play together with tiny dots and a soft cow-print accent. The earthy palette warms pale winter skin and looks perfect with chunky knits.
How To Create This Design
- Base coat, then one to two coats of sheer beige; cure.
- Use a liner brush to paint abstract swirls in chocolate, taupe, and ivory.
- Add a minimal cow print on one nail with irregular brown spots over ivory.
- Place three micro dots on an accent nail with a dotting tool.
- Finish with a high-gloss top coat; cure.
Pro Tip: Keep lines slightly organic—perfectly imperfect swirls feel modern and luxe.
#4. Icy Lilac Gift-Bow Nail Set

A hint of fairy-tale energy, icy lilac, baby blue, glitter edges, and a tiny chrome bow that looks like it was tied by a snow sprite. Pastel cool tones brighten light skin and deliver a playful, polished winter moment.
How To Create This Design
- Apply base coat; cure.
- Paint nails in alternating sheer pink, lilac, and baby blue; cure.
- Add glitter half-French or swirls with a liner brush and silver gel.
- Affix a chrome bow charm using rhinestone gel; flash cure.
- Top coat to encapsulate details; full cure.
Pro Tip: Place 3D bows on the middle or ring finger—less snagging, more spotlight.
#5. Candy Cane Snowflake Nail Set
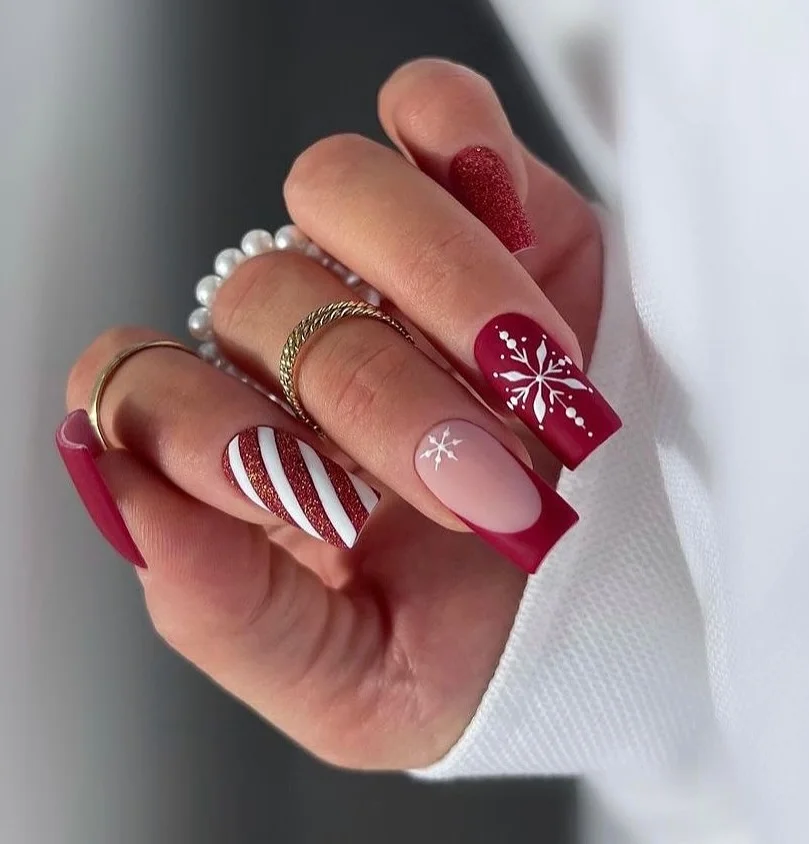
Classic holiday red gets a matte makeover, paired with candy-cane stripes and crisp white snowflakes. The saturated red pops beautifully against light skin and photographs like a dream for party nights.
How To Create This Design
- Base coat; cure.
- Paint deep red gel on most nails; cure and apply matte top coat.
- For stripes, lay a white base, then paint diagonal red glitter lines with a striping brush; cure.
- Add small white snowflakes on a red nail using a detail brush.
- Seal art nails with glossy or matte top coat to match the set.
Pro Tip: Matte top coat over red makes snowflakes appear sharper and more graphic.
#6. Blush Sweater Weather Nail Mix
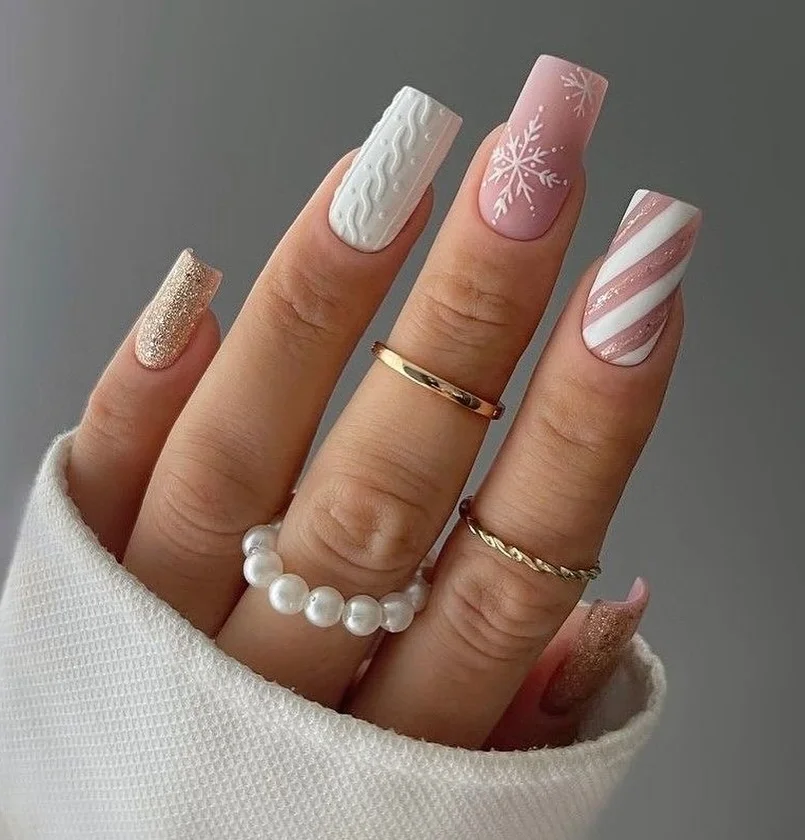
Soft pinks, cable-knit texture, sparkly stripes, and a gentle snowflake—like a cozy sweater and fresh snow in one look. The blush tones flatter fair complexions while the textures add interest without going loud.
How To Create This Design
- Base coat; cure. Apply blush pink gel on all nails; cure.
- Create the sweater nail: use thick 3D gel or acrylic gel to pipe knit lines; cure, then matte top.
- Add white snowflakes and diagonal candy-stripes on two nails with a liner brush.
- Paint one glitter-gold accent nail for warmth; cure.
- Finish remaining nails with matte or glossy top coat as desired.
Pro Tip: For raised knit, dust the wet gel with clear acrylic powder before curing to get that soft, sweater look.
#7. Soft Aurora Short Nail Palette

Short, rounded nails glow with milky white, misty lavender, pearl chrome, and tiny star studs. Minimalist but magical, this palette feels fresh and airy on light skin—like dawn on a frosty morning.
How To Create This Design
- Base coat; cure. Apply sheer pink or milky white base on all nails; cure.
- Add lavender on two nails and a champagne chrome powder on one (rub over no-wipe top).
- Paint fine white lines and micro dots on a couple of nails for delicate accents.
- Place tiny star studs with rhinestone gel; cure.
- Seal with glossy top coat.
Pro Tip: Keep nails short and rounded—this palette looks most refined on a neat, natural length.
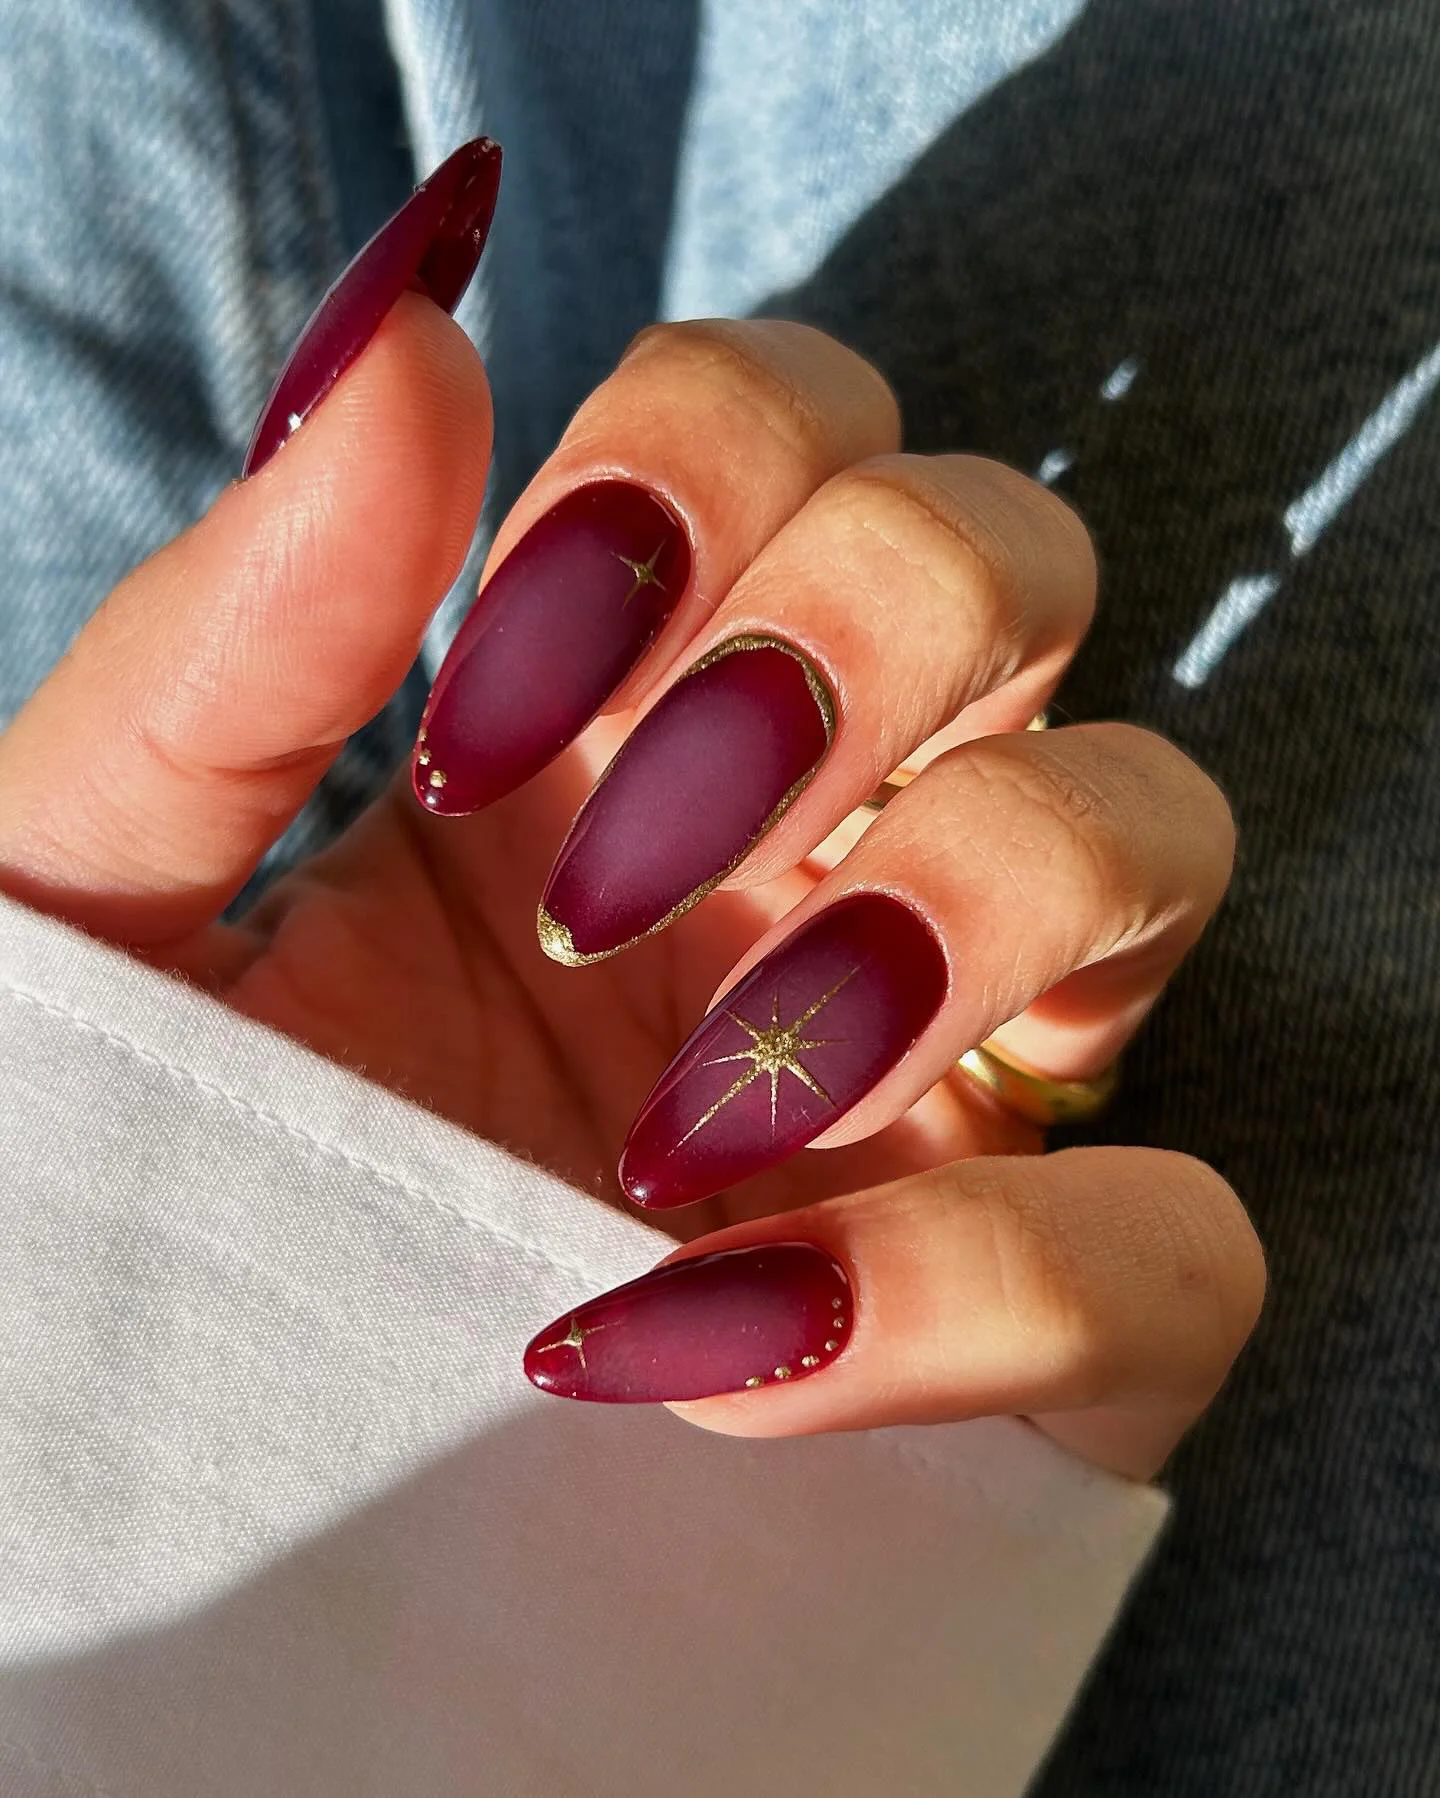
#8. Garnet Starlight Matte Nail Glam

A deep garnet matte base edged with golden halos and tiny celestial bursts—high drama with a velvet finish. The rich wine shade brings warmth to light skin, while gold pops like jewelry.
How To Create This Design
- Base coat; cure. Apply two coats of garnet red gel; cure.
- Add a matte top coat; cure fully.
- With metallic gold gel, outline a soft halo near the cuticle on select nails.
- Use a liner brush to draw small starbursts and place micro beads.
- Seal only the gold art with a thin layer of no-wipe top to keep contrast (matte vs. shine).
Pro Tip: Wipe matte nails with alcohol before detailing—oil-free surfaces keep gold lines crisp.
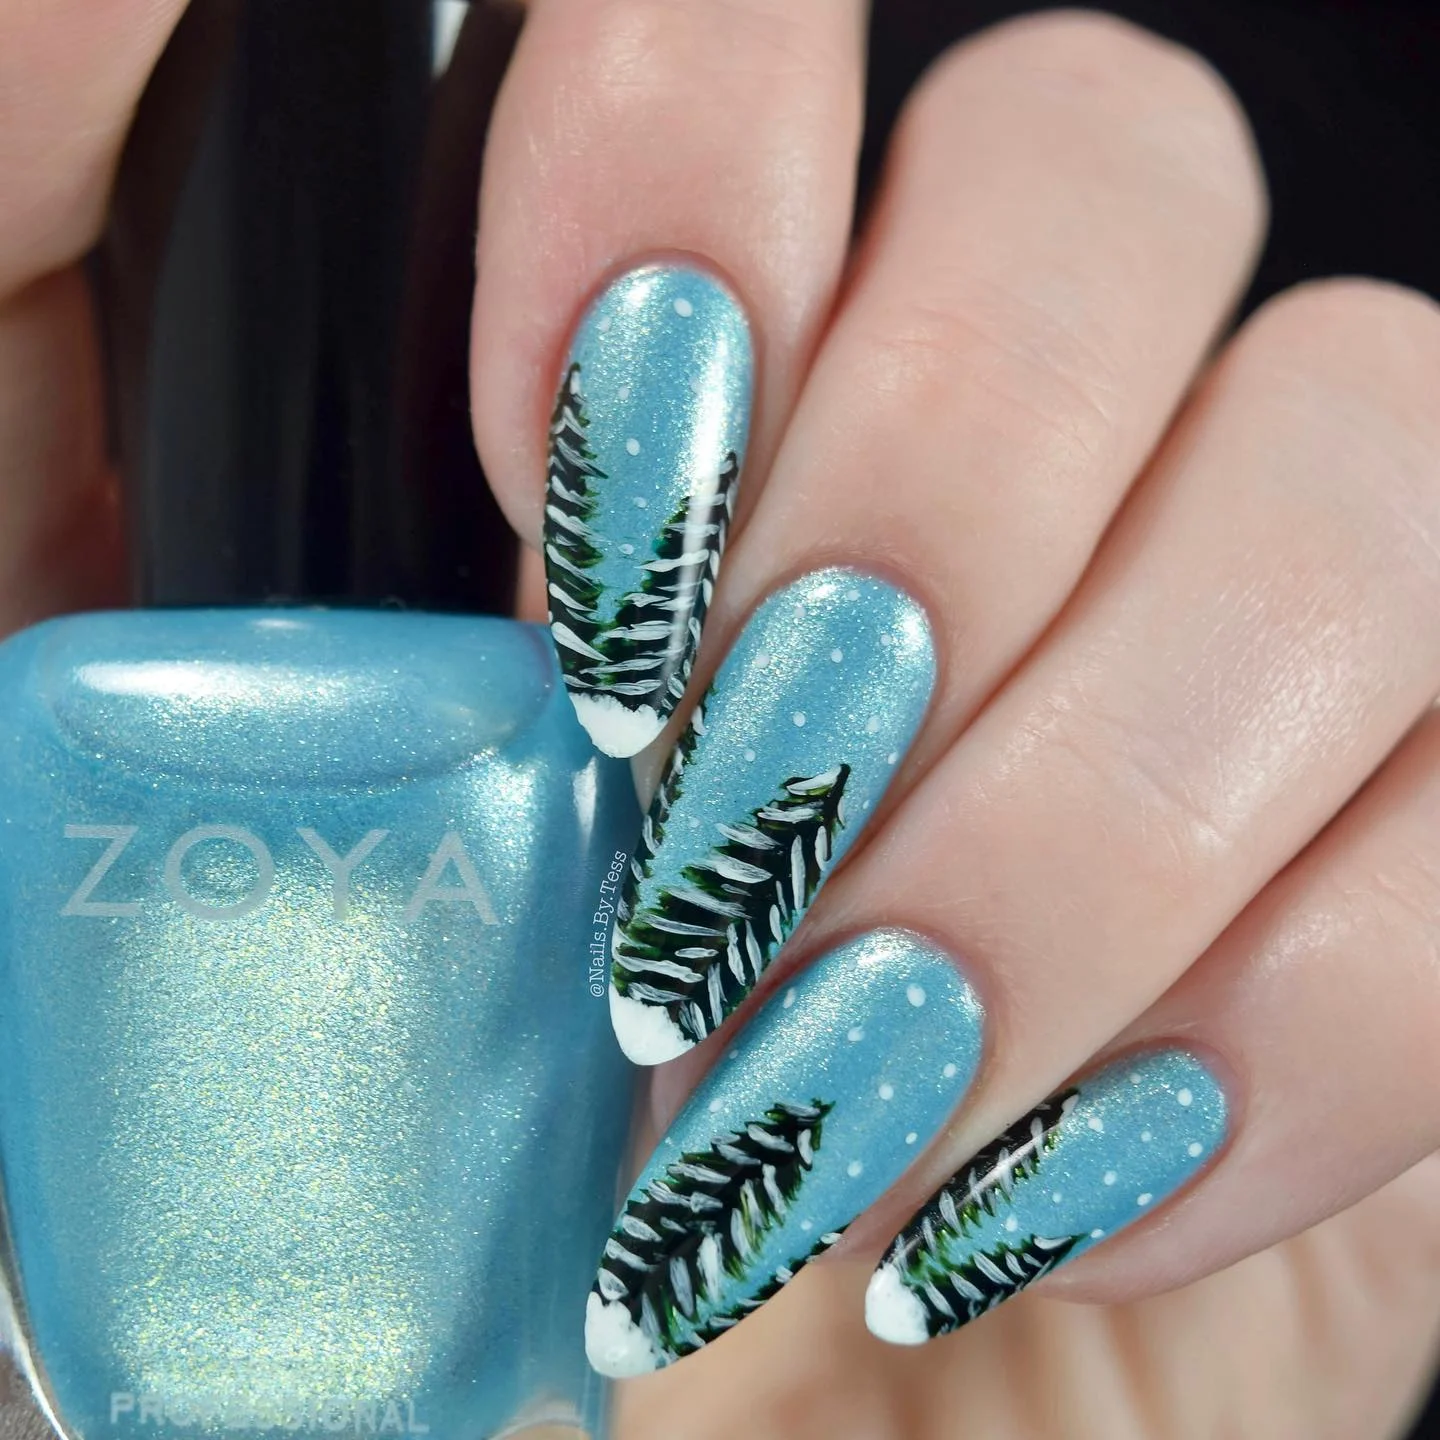
#9. Icy Blue Crystal French Nail Sparkle

Frosty blue tips and tiny crystal constellations feel delicate and bright, like sunlight on a frozen lake. The cool blue brings out rosy undertones in light skin for a fresh, youthful finish.
How To Create This Design
- Base coat; cure. Apply a sheer nude gel; cure.
- Paint slim side-smile blue tips with a liner brush; cure.
- Place iridescent rhinestones in tiny clusters using rhinestone gel; flash cure.
- Lock everything in with a glossy top coat; full cure.
Pro Tip: Keep tips narrow—thin blue edges elongate shorter nail beds beautifully.
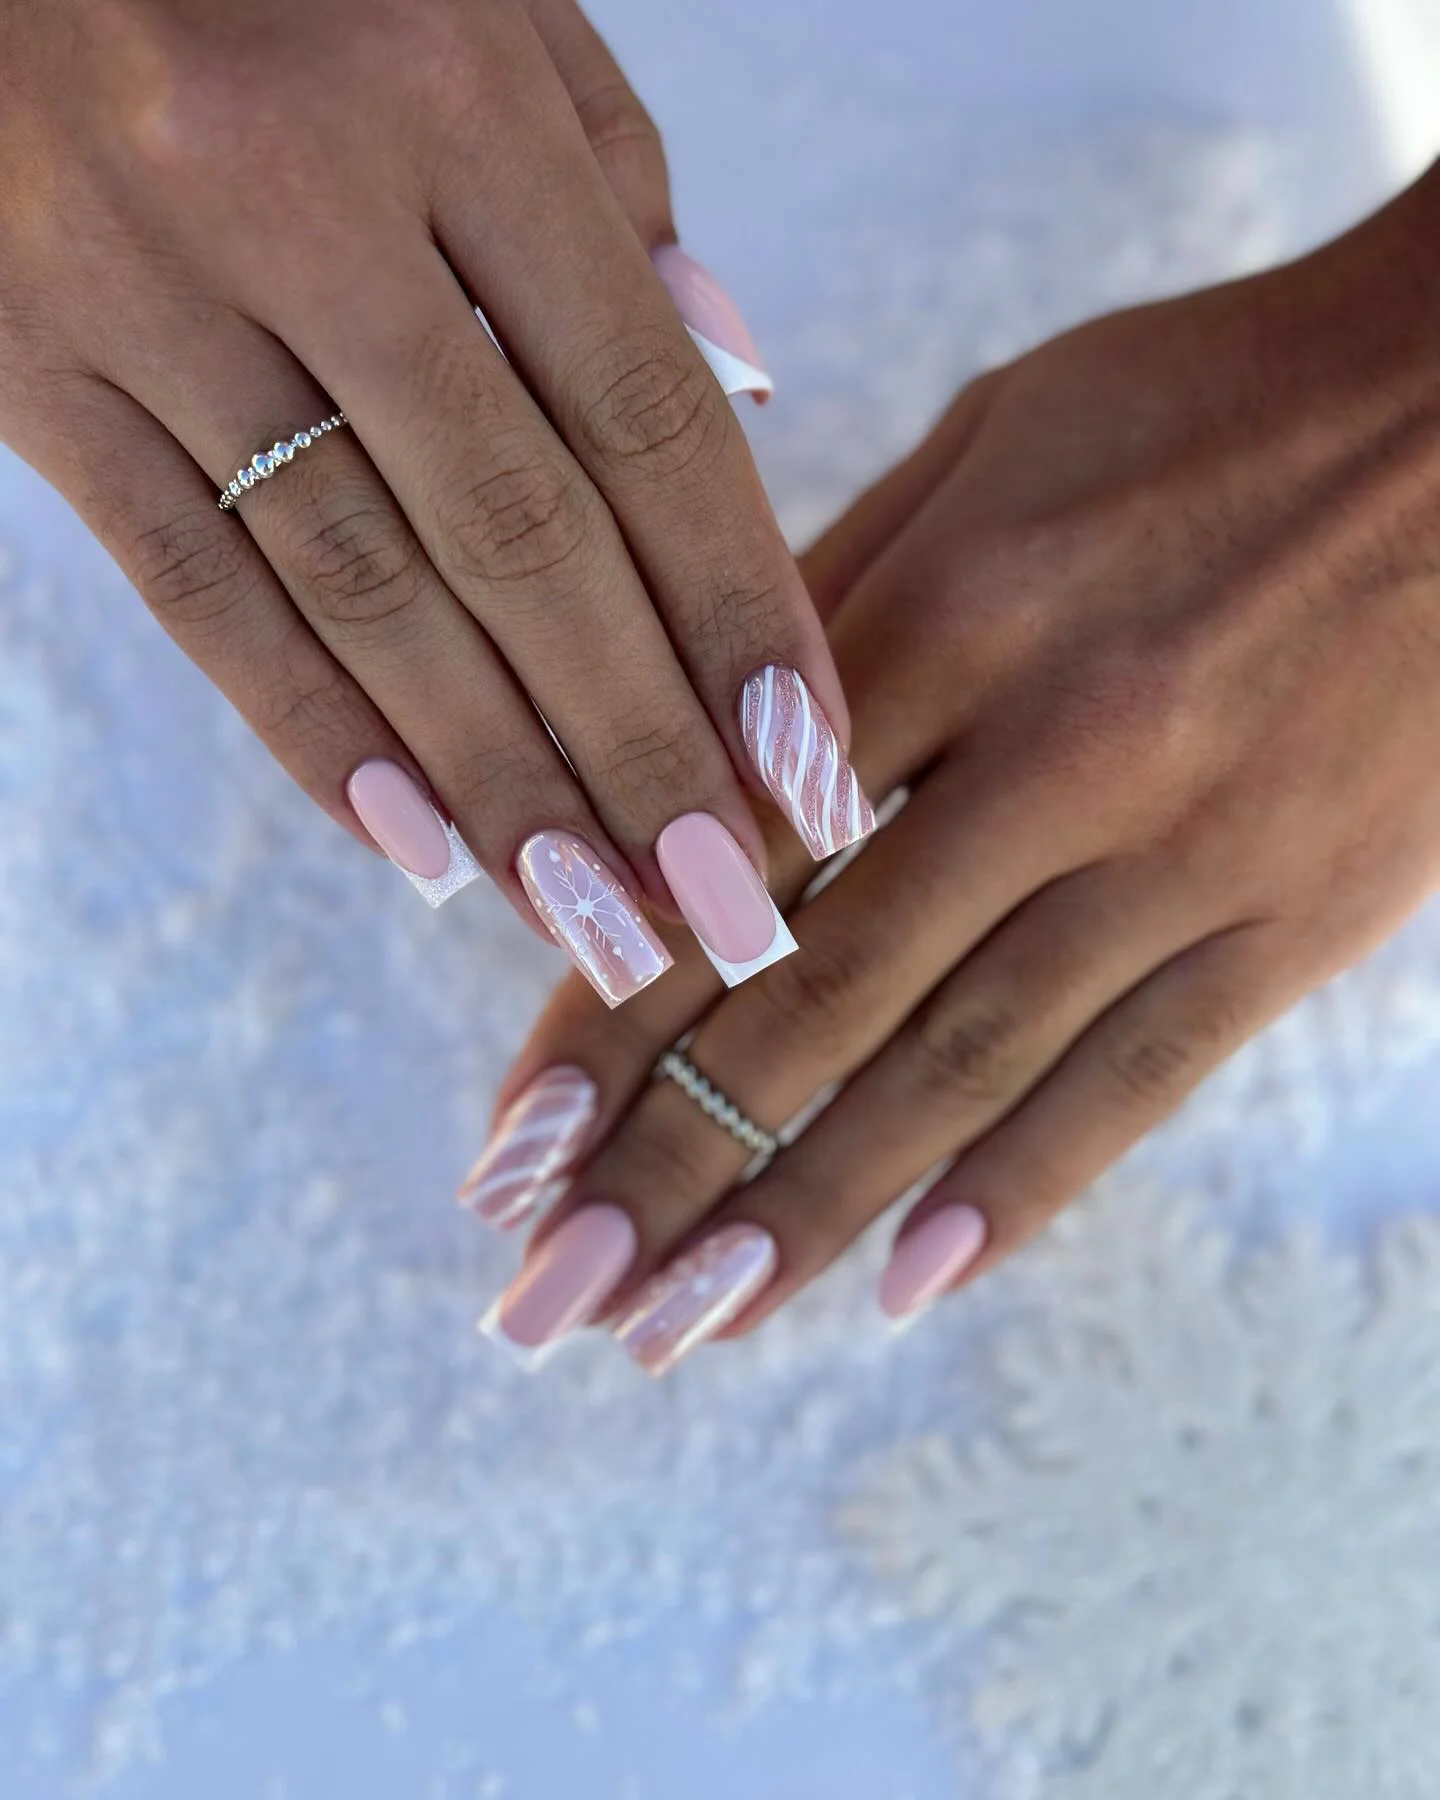
#10. Whisper White Winter Nail Waves
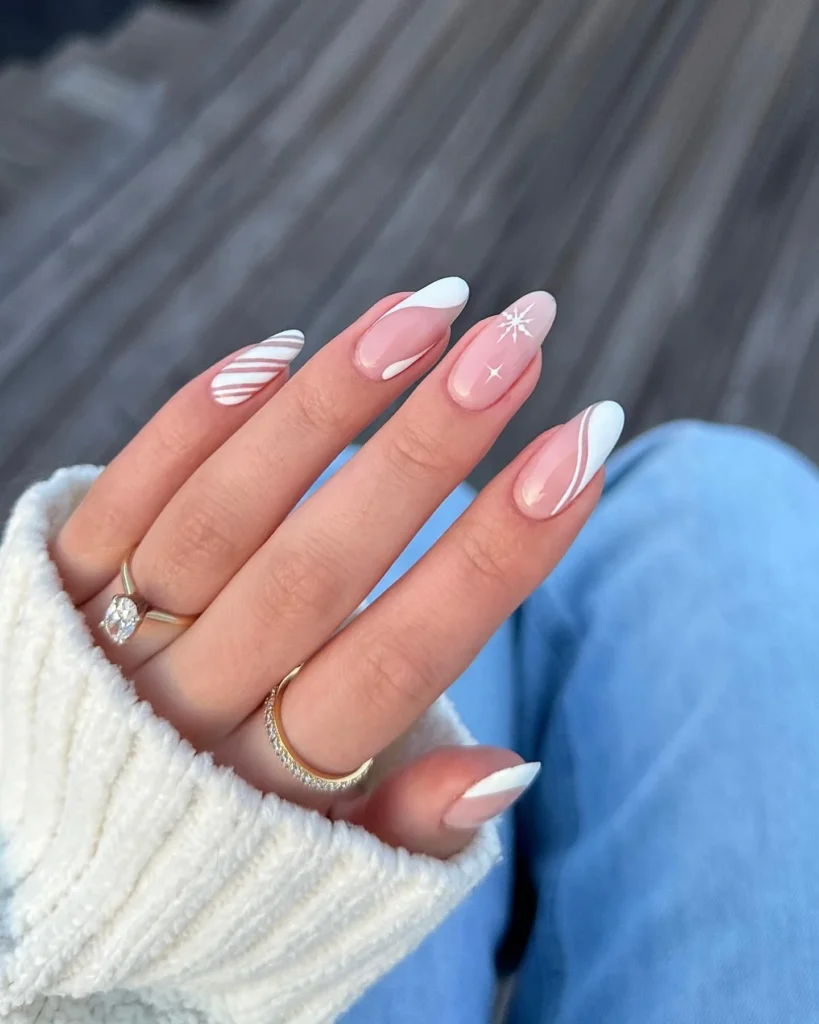
Clean white curves, a tiny star, and a single snowflake over a soft pink base—minimal winter poetry. The negative space keeps it airy, while the white pops against light skin for a fresh, polished look.
How To Create This Design
- Base coat; cure. Apply two coats of sheer pink; cure.
- With white gel and a fine liner, sweep soft sidewaves and one abstract French.
- Add a micro snowflake and a tiny four-point star; cure.
- Finish with a glossy top coat; cure and oil.
Pro Tip: Rest your painting hand on the table and turn the finger—not the brush—to get fluid, even curves.
#11. Gift Wrap Nail Elegance

Deep red nails are elevated with plaid-inspired gold striping and delicate white snowflakes, turning fingertips into tiny holiday presents. The balance of glossy red and crisp detailing makes this look feel luxe and festive on light skin.
How To Create This Design
- Apply base coat; cure.
- Paint all nails in glossy cherry red gel; cure.
- On accent nails, add thin vertical and horizontal gold striping tape.
- Use white gel polish to hand-paint snowflakes over the plaid nails.
- Seal with glossy top coat; cure.
Pro Tip: Use a striping brush dipped in metallic gel if you don’t have striping tape—cleaner and longer-lasting.
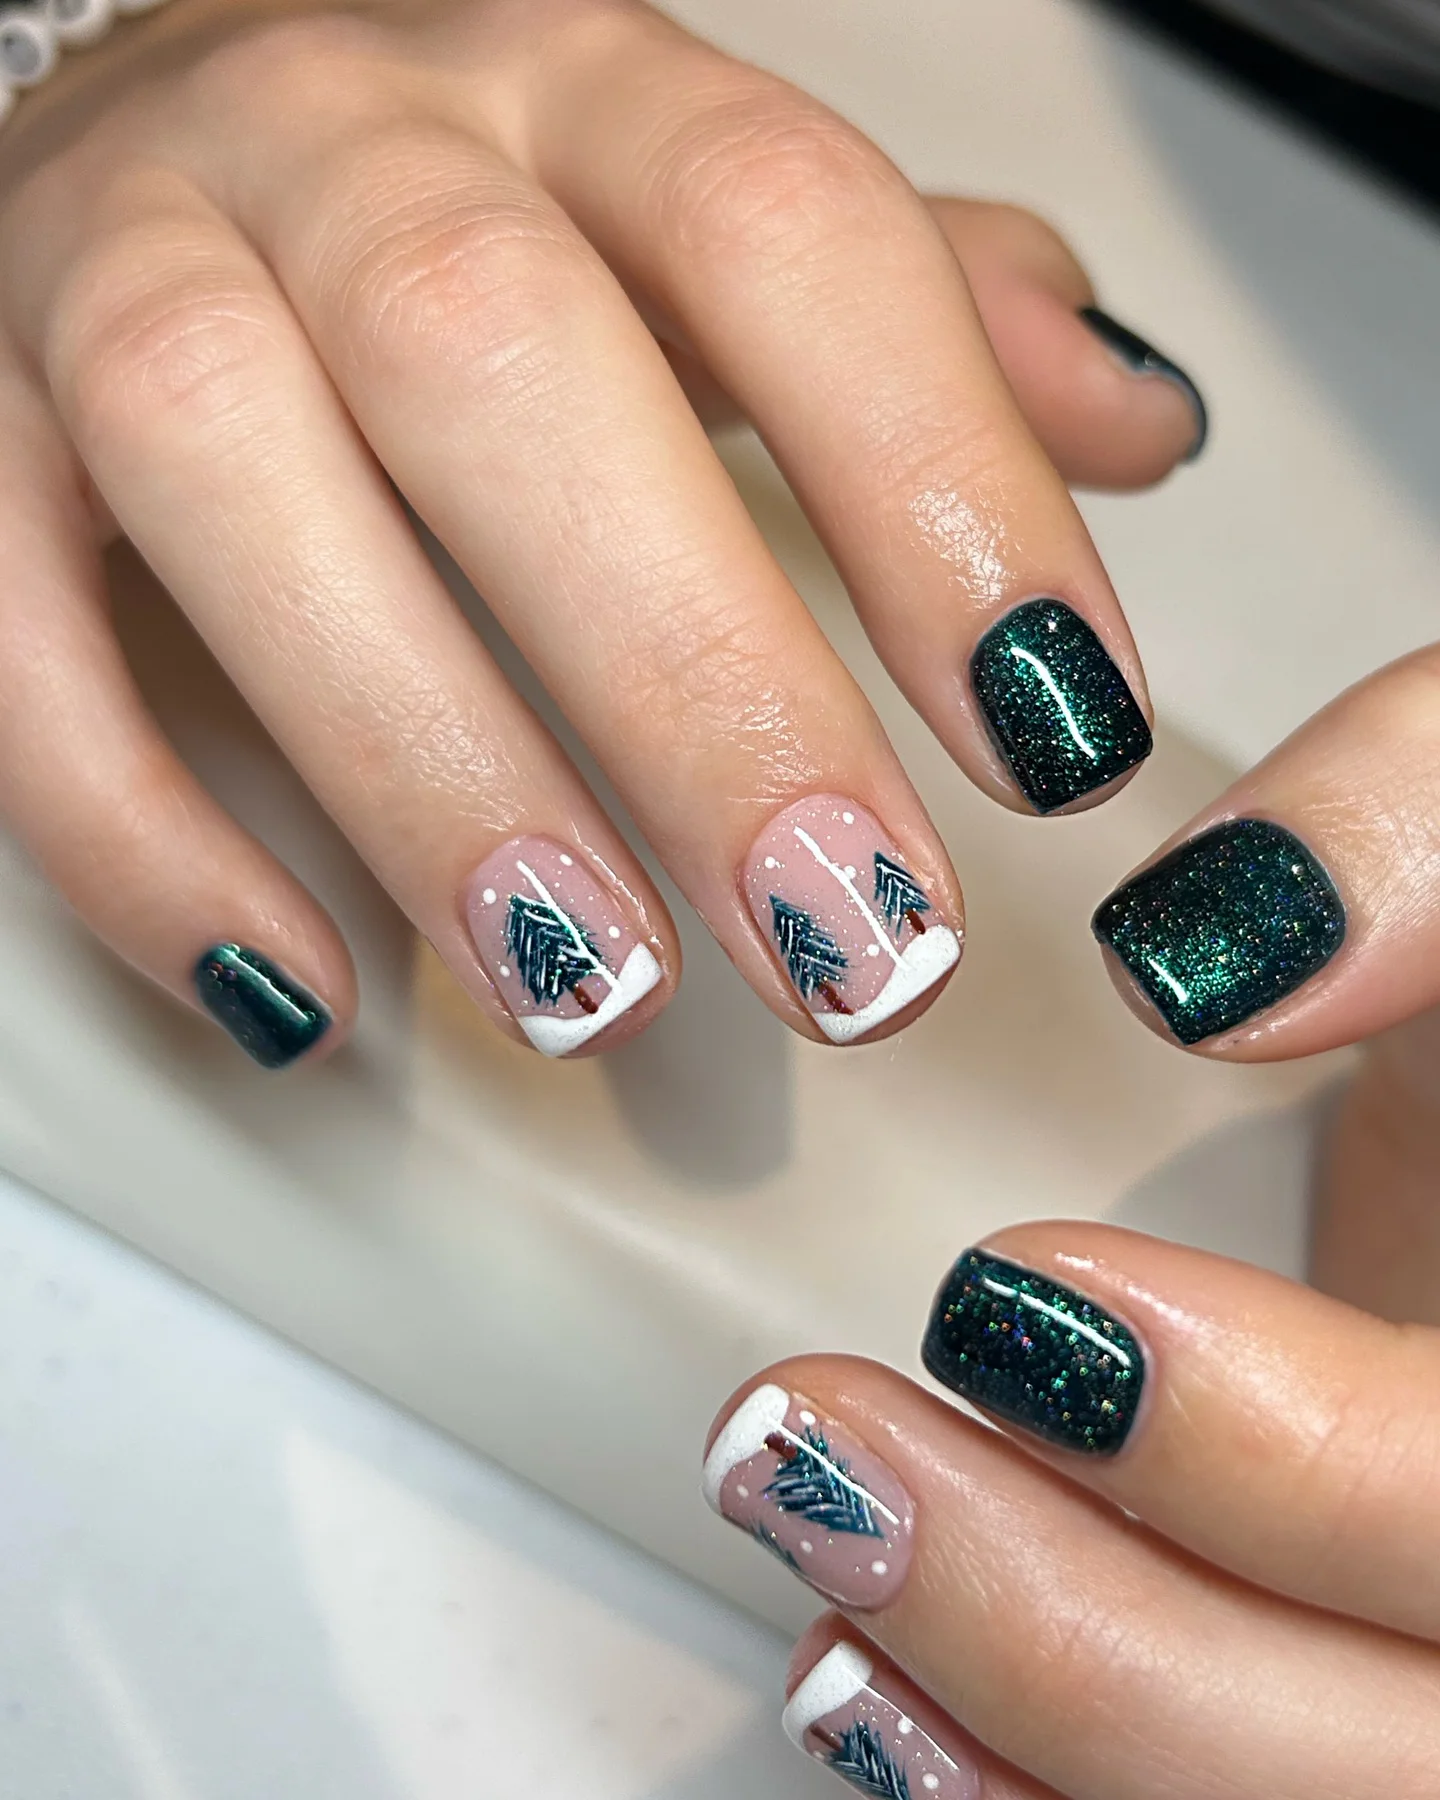
#12. Holiday Forest Nail Charm

Rich green and burgundy shades blend like a winter forest at dusk, complete with painted snowflakes, pine sprigs, and holly berries.
How To Create This Design
- Base coat; cure. Apply a blend of dark green and burgundy gel, fading colors together with a sponge.
- Add shimmer powder before curing for a glowing base.
- With white gel, hand-paint snowflakes on select nails.
- Use green and red gels to paint holly sprigs and berries.
- Top with glossy or matte coat for desired finish.
Pro Tip: Matte top coat enhances hand-painted details, making them pop more clearly.
#13. Golden Blossom Pink Nail Glow
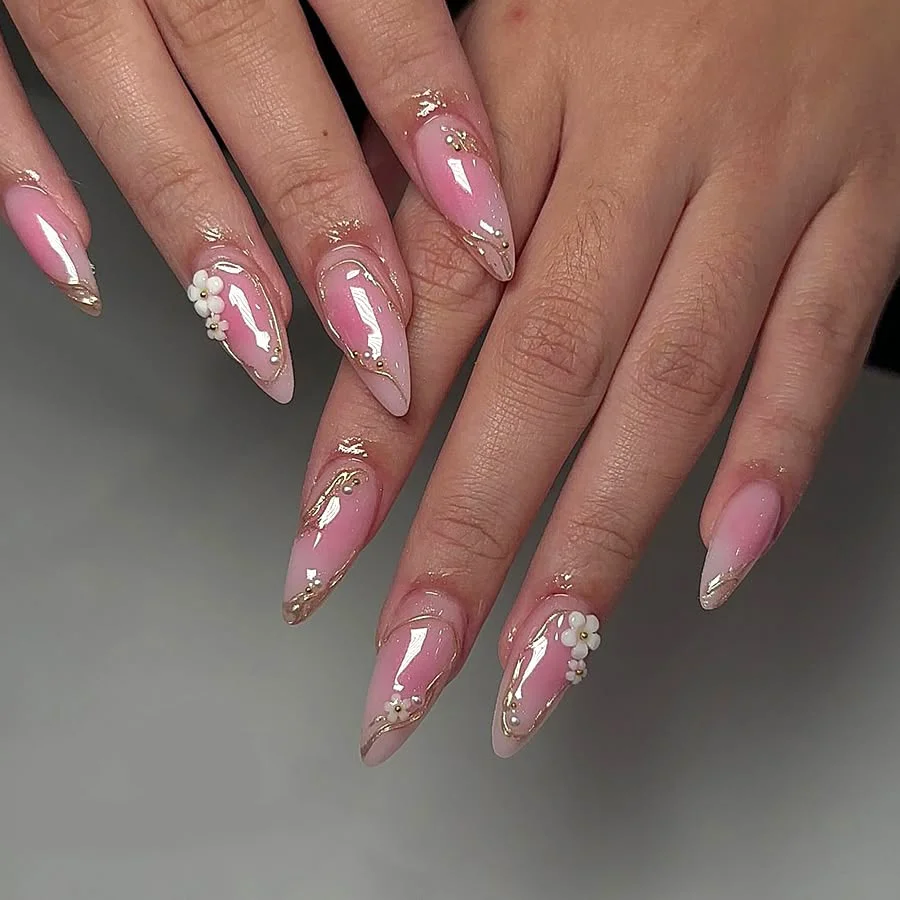
Soft blush nails are given a romantic lift with golden swirls and 3D floral accents. The dreamy blend of pink and gold shines especially well on light skin, delivering a delicate yet sophisticated winter vibe.
How To Create This Design
- Base coat; cure.
- Apply two coats of blush pink gel polish; cure.
- Outline tips with metallic gold gel using a liner brush; cure.
- Add tiny gold swirls and micro beads for decoration.
- Sculpt small 3D white flowers with builder gel and attach with rhinestone glue.
- Seal with glossy top coat.
Pro Tip: Place 3D flowers sparingly—one or two per hand keeps the look elegant.
#14. Crimson Sparkle Snowflake Nails

Nothing says festive like glittery red nails. A few white snowflakes and subtle dotted accents add a winter touch, while the shimmer ensures every move catches the light.
How To Create This Design
- Base coat; cure.
- Apply two coats of glittery crimson gel; cure.
- On accent nails, paint small snowflakes and dots using a fine brush and white gel.
- Cure and seal with glossy top coat.
Pro Tip: Choose a fine-grain glitter polish, it creates an even sparkle that feels more high-end.
#15. Icy Marble Nail Illusion
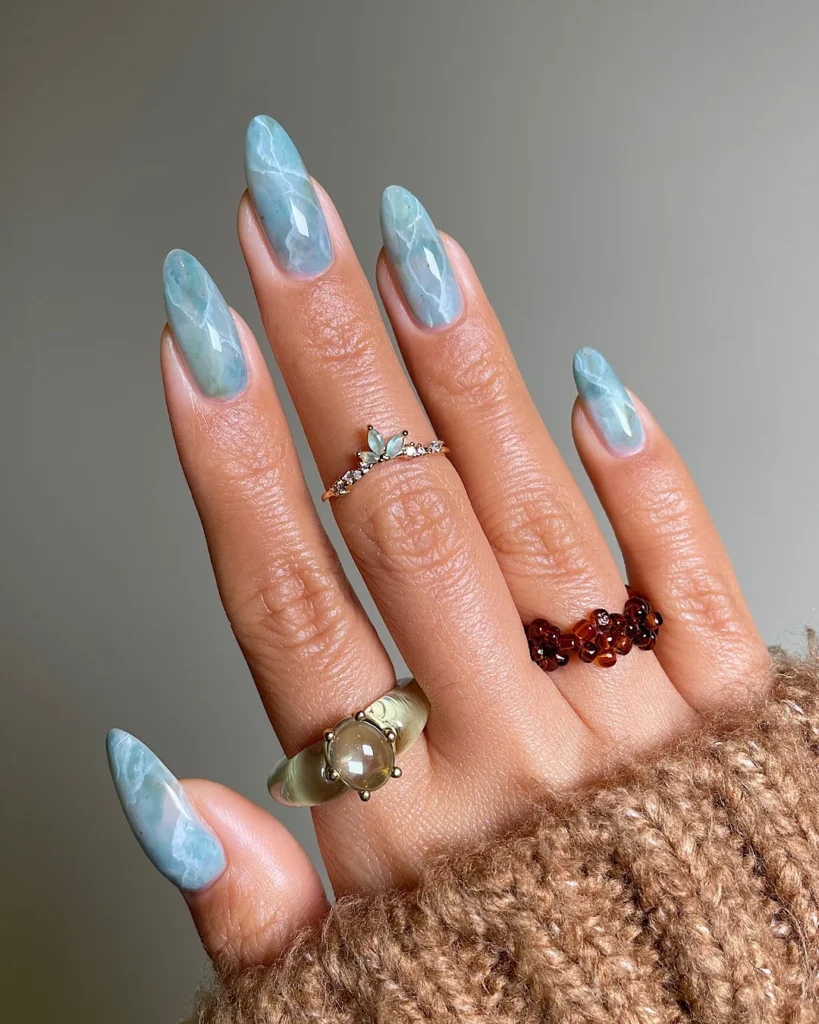
This icy blue marble design has a frosted, gemstone-like appearance—soft veins of white ripple through a pale aqua base, resembling frozen lakes. On light skin, the effect is crystal-clear and effortlessly chic.
How To Create This Design
- Base coat; cure.
- Paint nails with a light aqua blue gel; cure.
- Mix white gel with acetone to thin it, then lightly drag veins across the nail with a detail brush.
- Blend gently with a small sponge for a soft marble effect; cure.
- Apply glossy top coat for a glassy finish.
Pro Tip: Layer the marble veins instead of overloading at once—thin, subtle strokes create a more realistic look.
Conclusion:
Winter doesn’t last forever, but the right nail style can make every chilly day feel a little brighter. Whether you’re drawn to icy pastels, glittery reds, or soft sweater textures, each design is a reminder that beauty lives in the details.
Pick the one that feels most you, and let your nails be the sparkle your winter outfits didn’t know they needed. Because honestly, why should holiday lights have all the fun?

Olivia Tran is the founder and creative force behind TheNailDesigns.