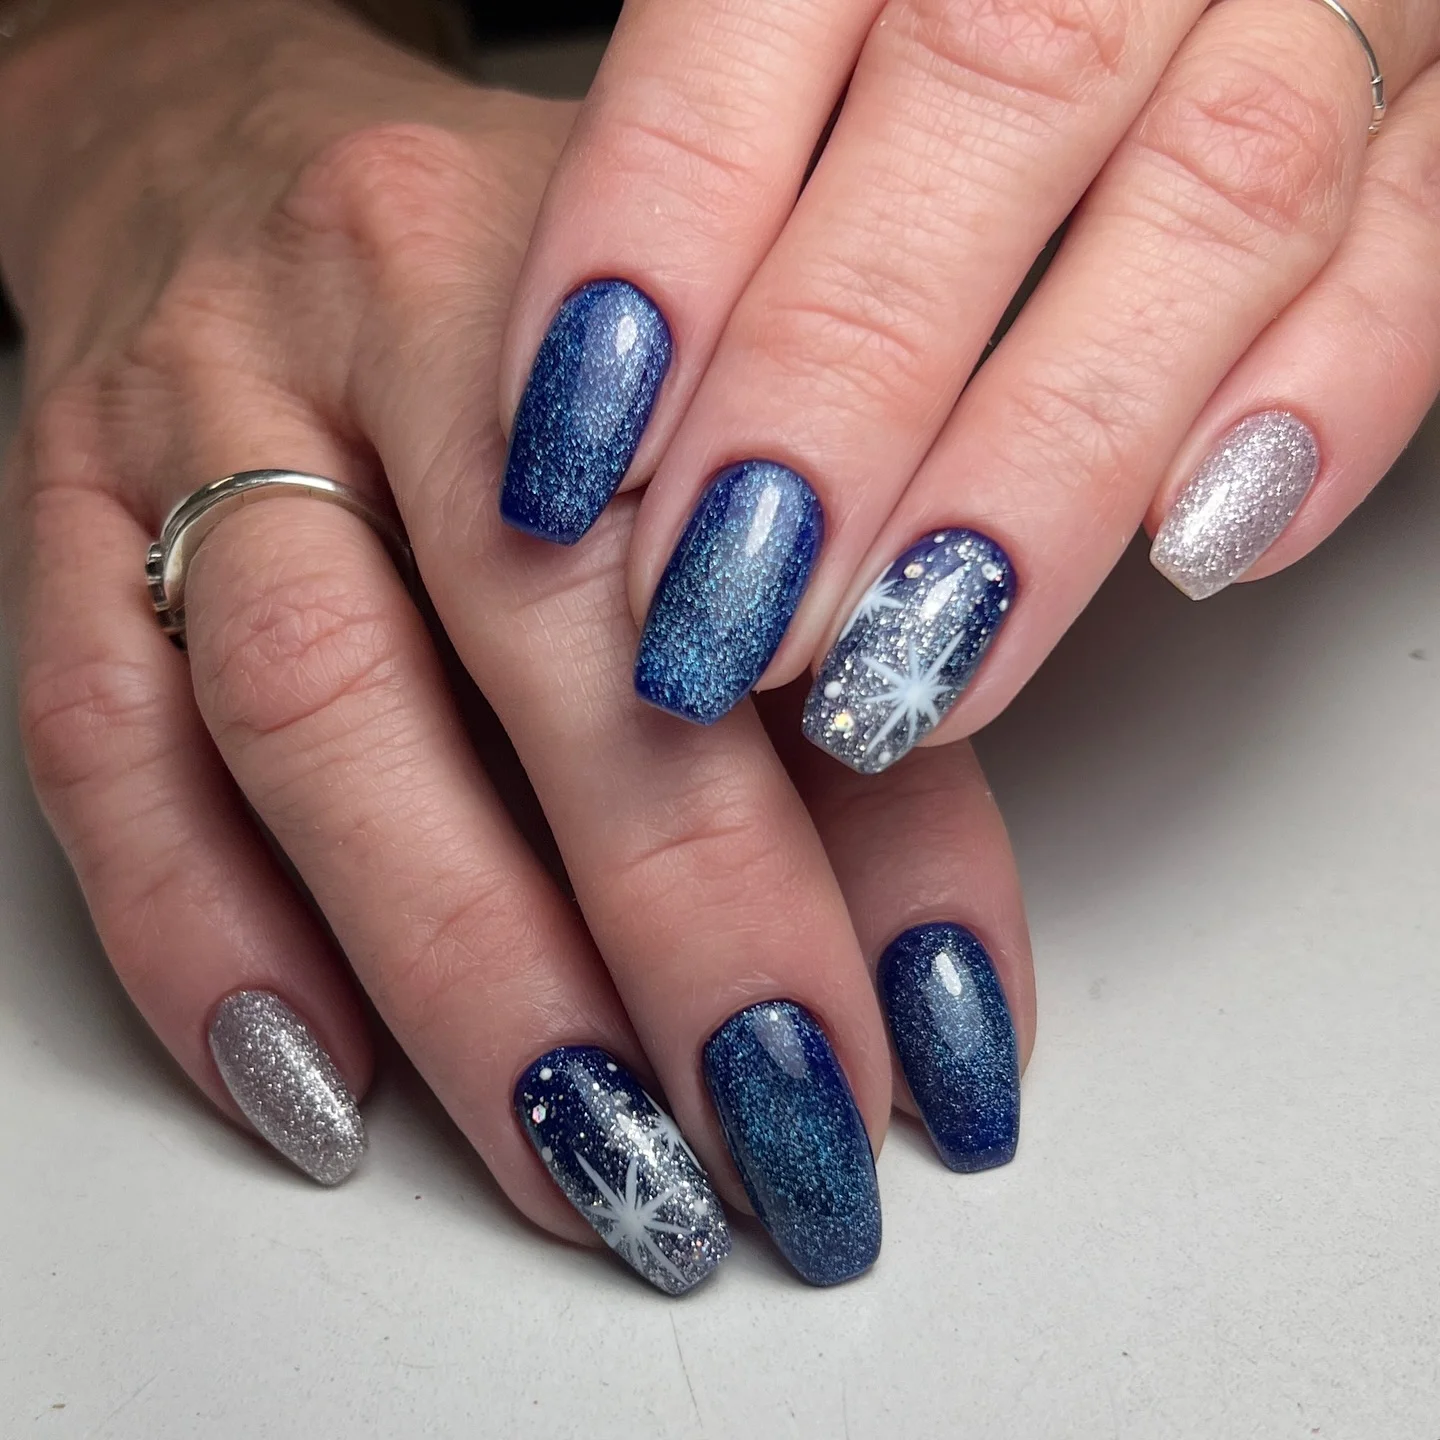

How to Style 15 Purple & Gold Nail Designs for a Luxe
Gold and purple name a more iconic duo, I’ll wait. These shades scream luxury, confidence, and a touch of mystery all at once. Whether you’re dressing up for a night out or just want to feel like royalty while holding your coffee, these 15 purple and gold nail designs are pure magic.
Ever looked down at your nails and felt instantly put together? Yeah, that’s exactly what these looks are about. Keep scrolling your next obsession is waiting.
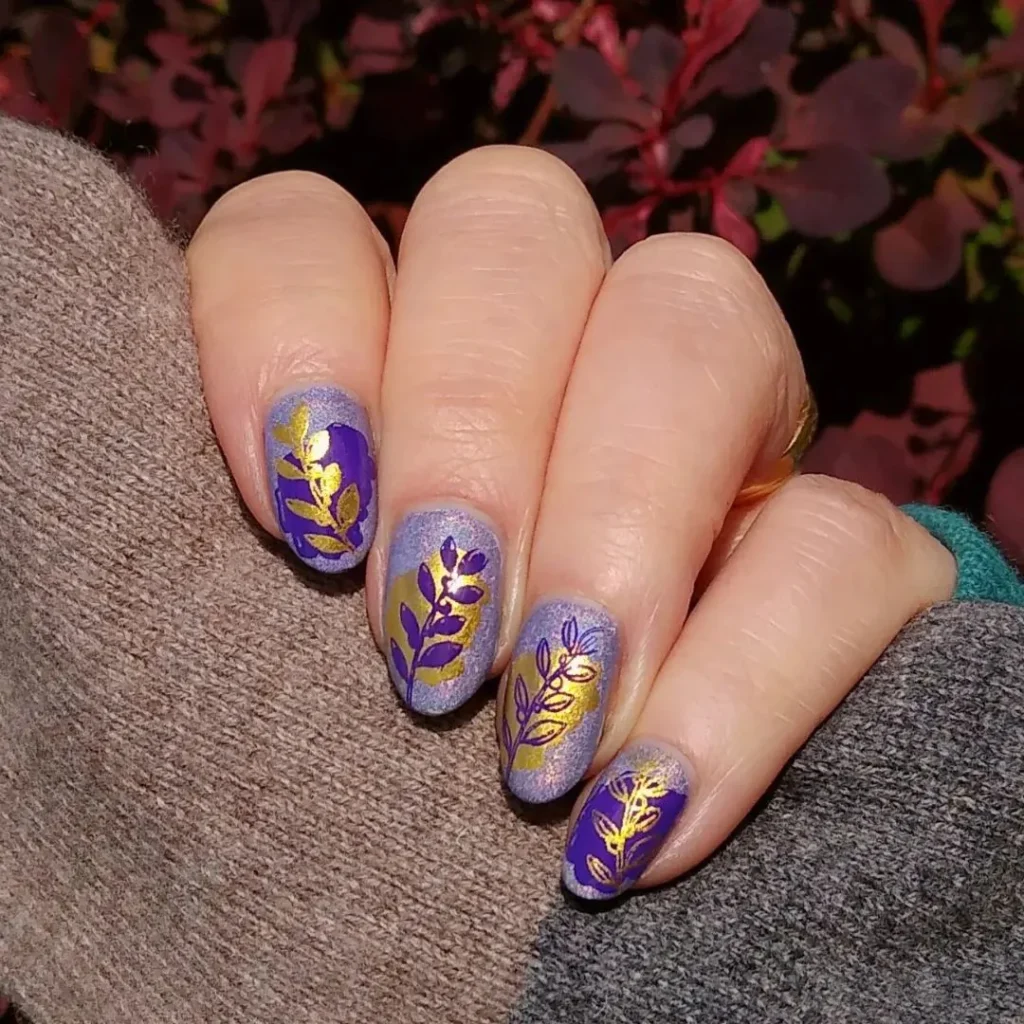
#1. Lavender Floral Nail Design
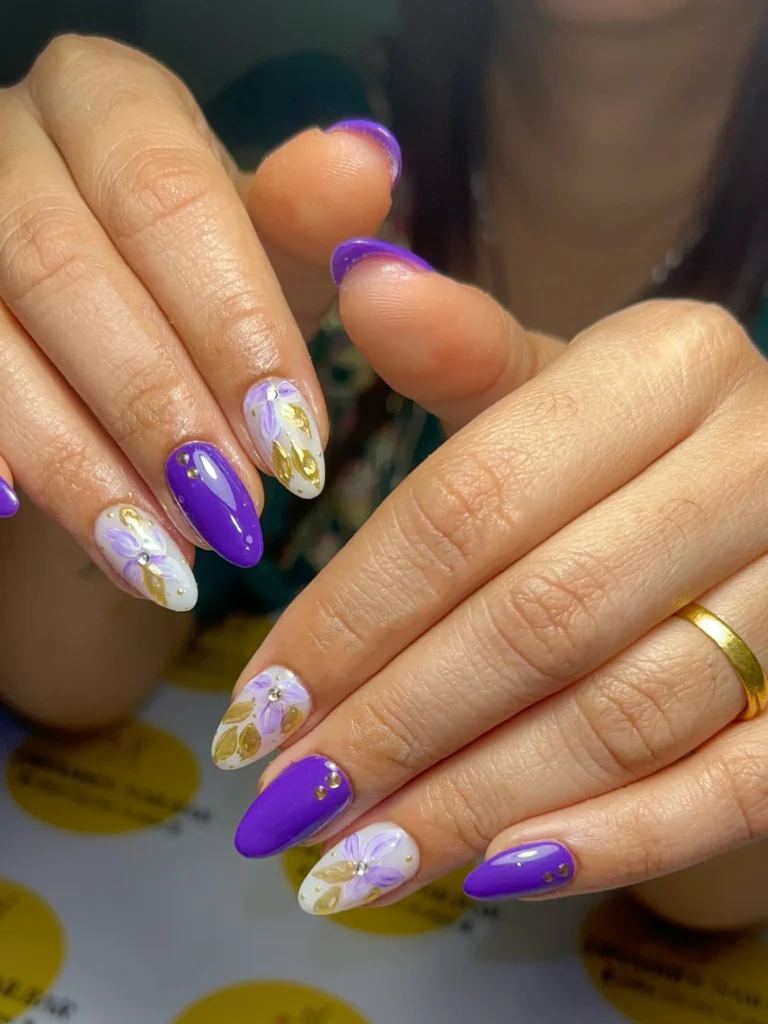
The 3D flower details make it feel like wearing tiny pieces of art. The shimmer catches the light just right, adding a touch of romance that feels both gentle and royal. Every glance feels like spring wrapped in gold.
How To Recreate This Nail Look:
- Apply a clear base coat to protect your nails.
- Paint every alternate nail with pastel purple polish.
- Use a thin detail brush to draw golden leaves and lilac petals.
- Add small rhinestones or beads at the flower centers.
- Seal everything with a glossy top coat for shine.
Pro Tip: Use a dotting tool to place rhinestones neatly and evenly.
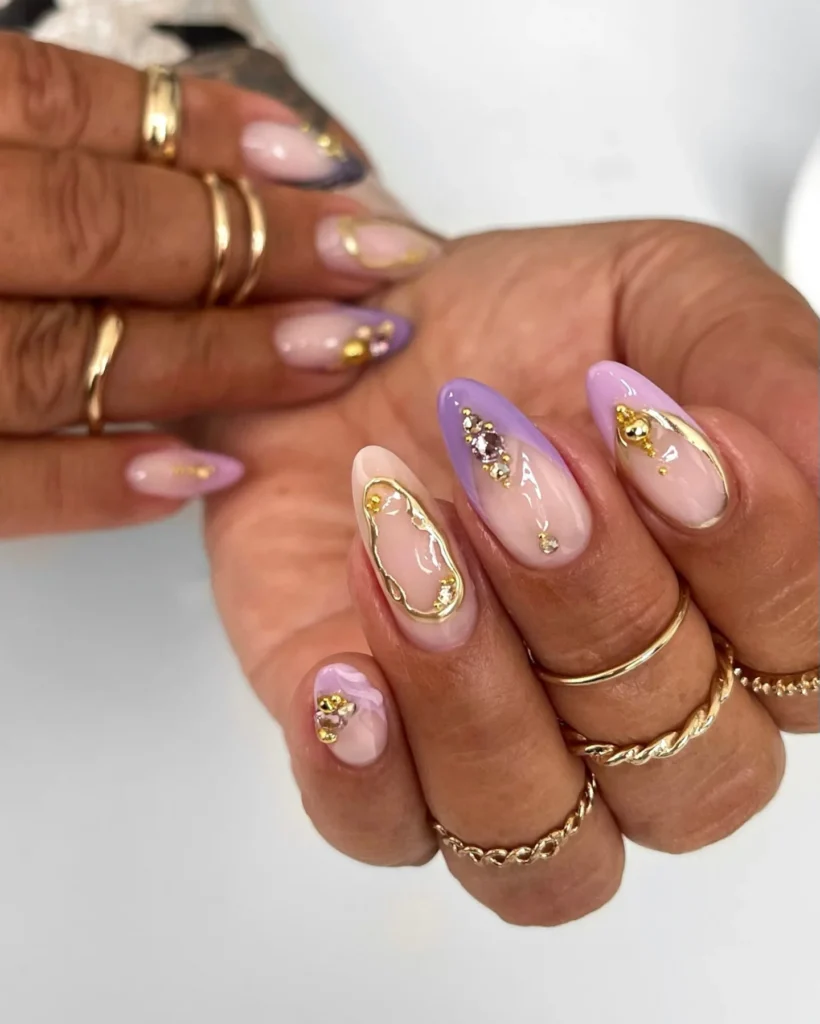
#2. Glam Spider Web Nail Art
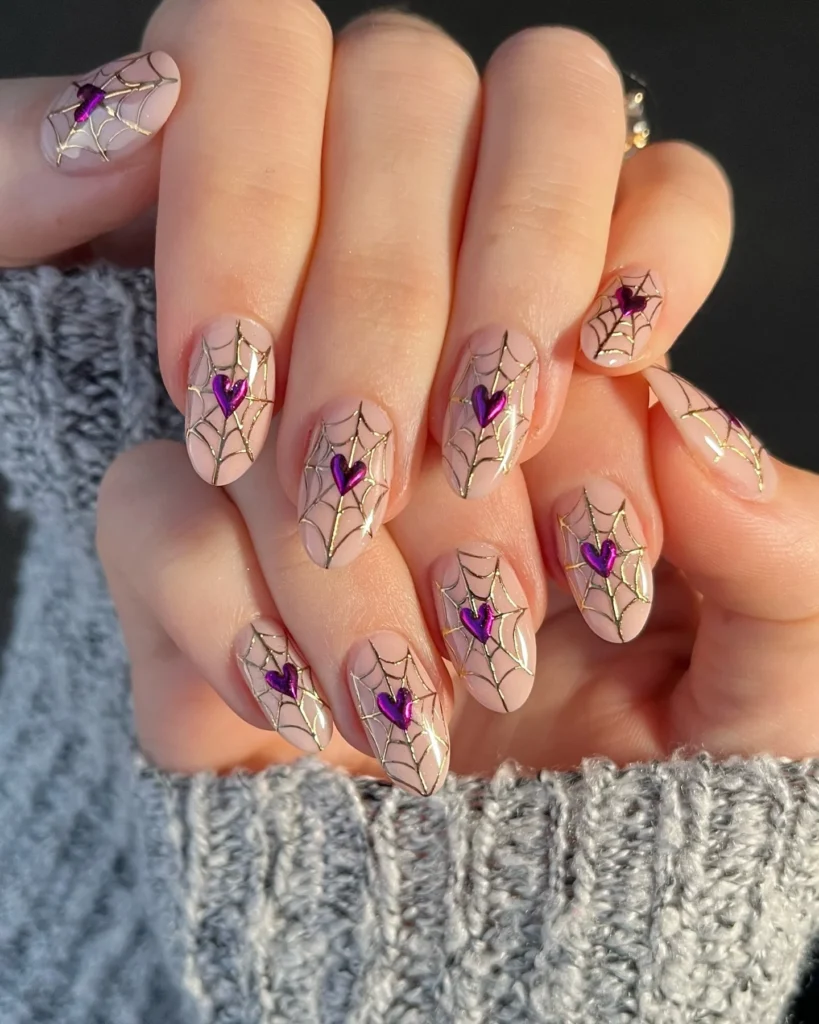
Honestly, this purple heart and gold web combo is pure statement energy. It’s bold but still chic enough to wear beyond Halloween. The golden lines shimmer beautifully against the nude base, making the purple pop like royal jewels.
Steps To Nail This Design:
- Start with a nude gel base coat.
- Use a fine liner brush and gold polish to draw thin web patterns.
- Paint tiny purple hearts at the center of each nail.
- Add a layer of shimmer top coat for subtle sparkle.
- Cure and finish with a glossy seal.
Pro Tip: Use metallic gold nail tape for cleaner web lines.
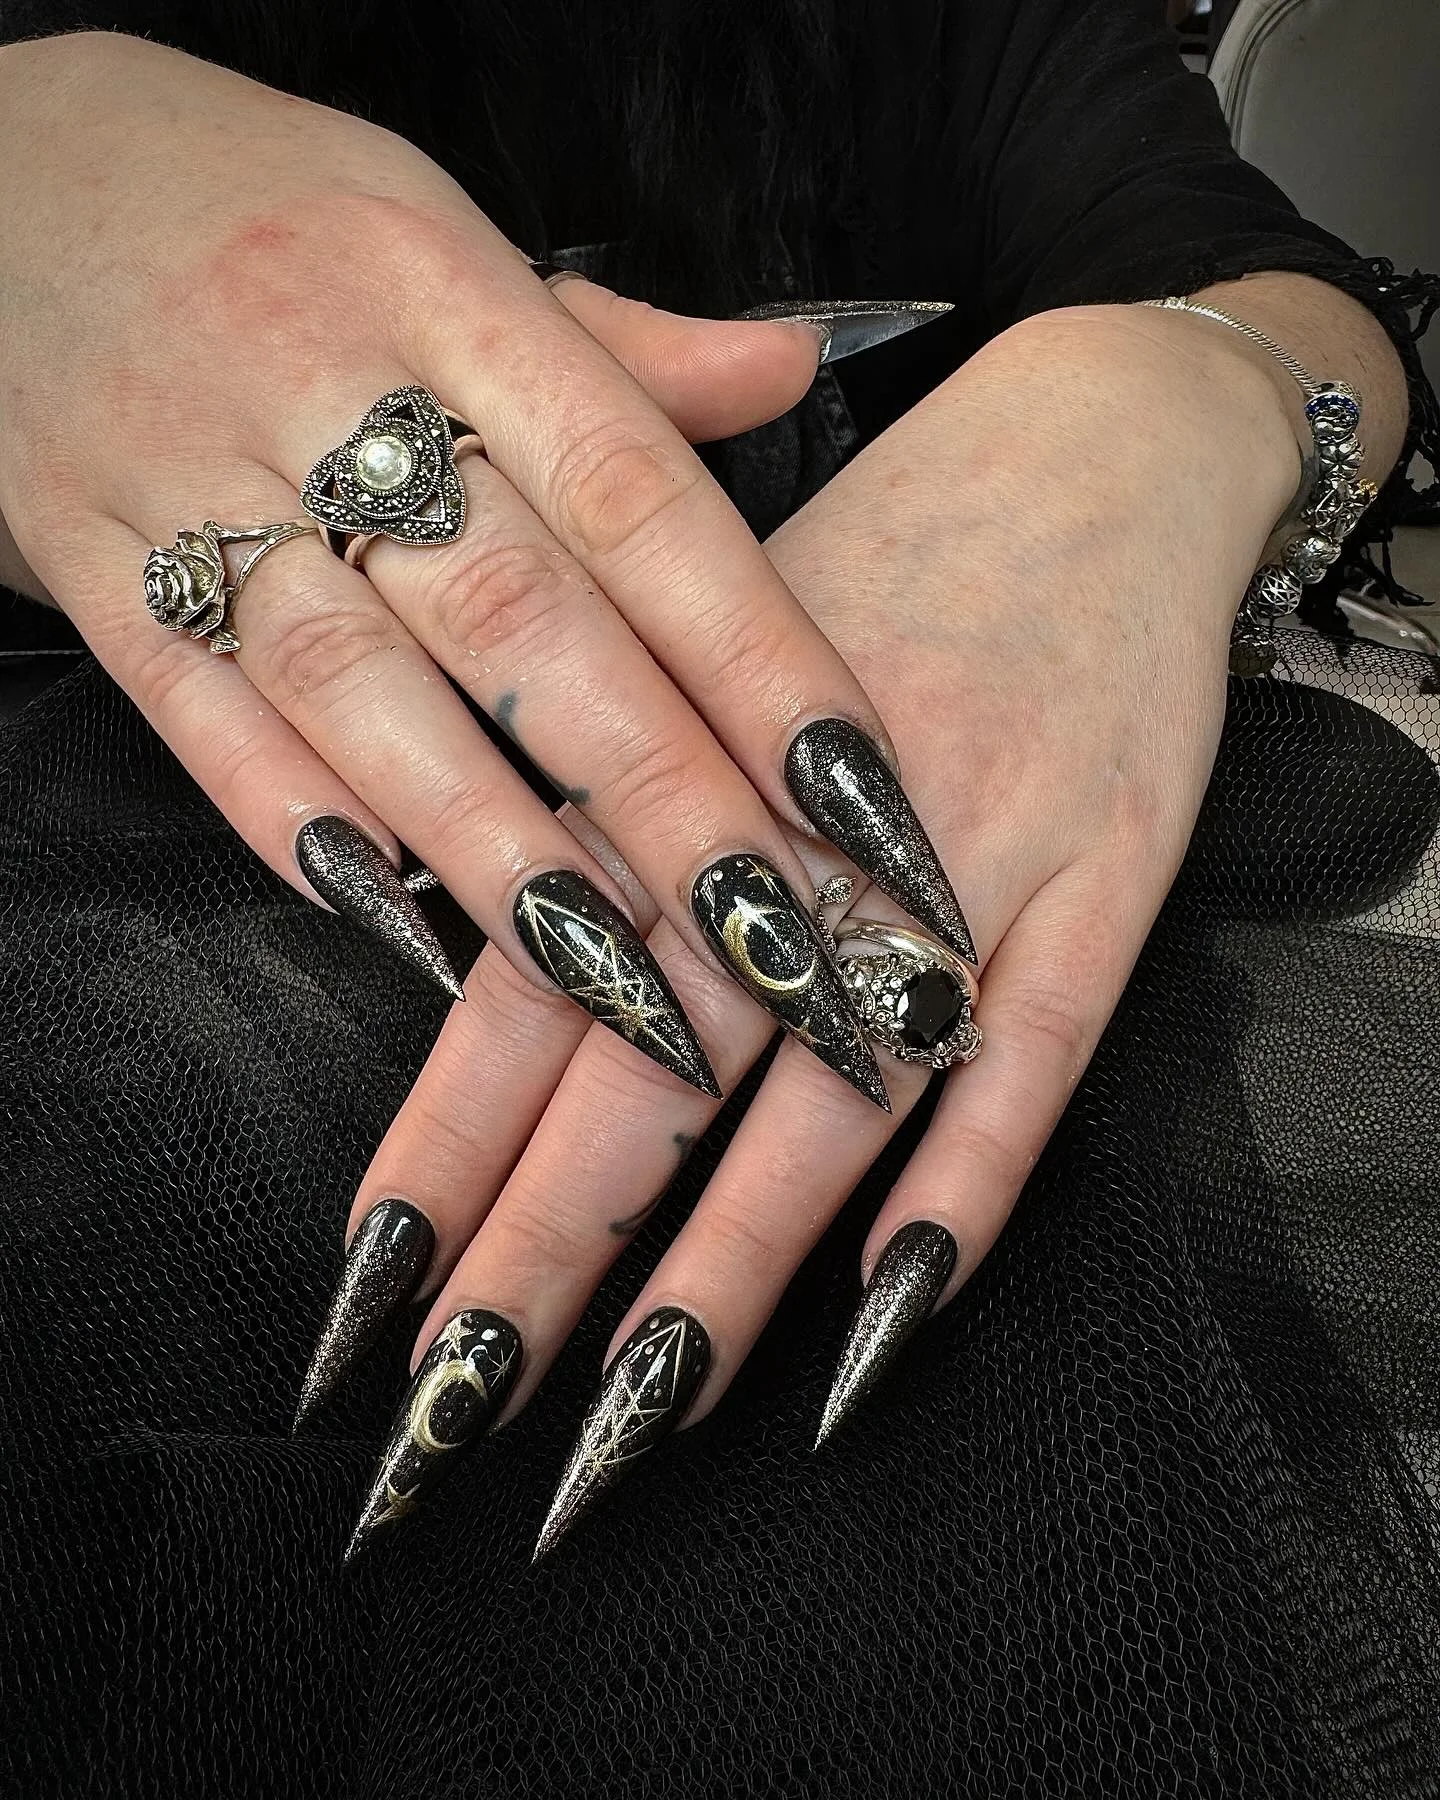
#3. Midnight Galaxy Purple and Gold Nail Art
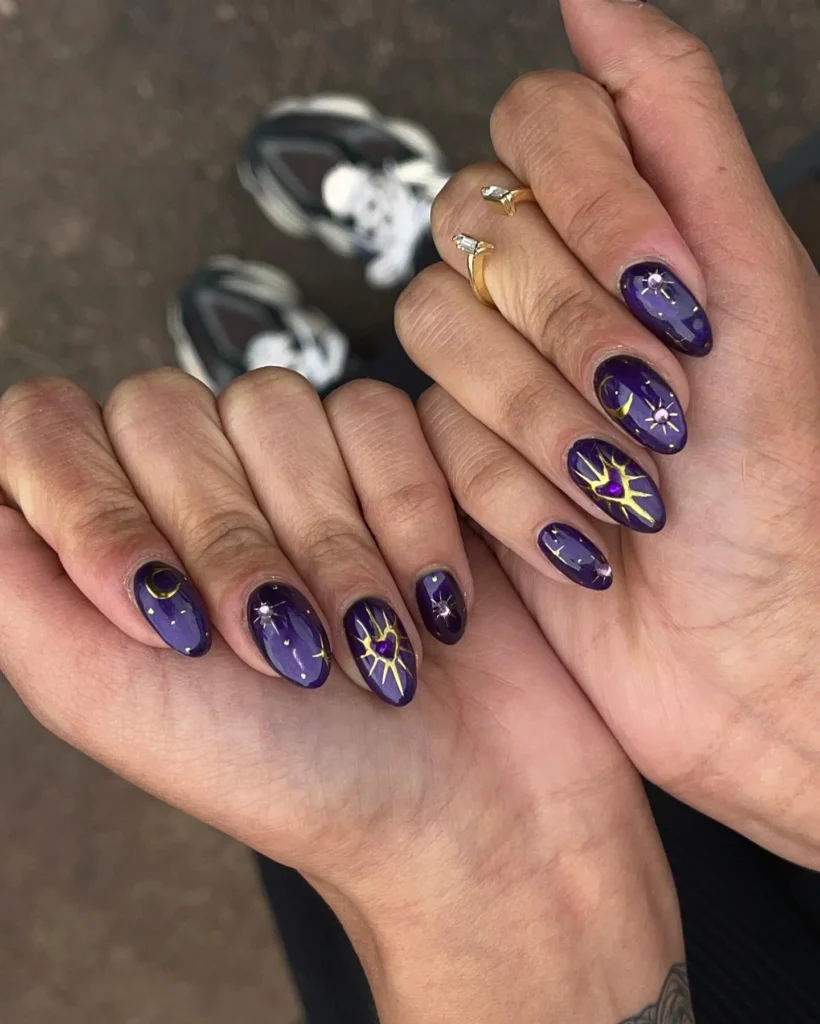
These nails remind me of looking up at a night sky filled with stars. The deep purple base feels like velvet, and those gold celestial accents give total goddess vibes. I wore this once on a night out, and every light made it twinkle differently.
DIY Guide Achieving The Look:
- Apply a dark purple gel polish base.
- Cure and layer with a second coat for depth.
- Use gold foil or metallic paint to create moon and star shapes.
- Add a touch of glitter top coat.
- Seal with a glossy finish.
Pro Tip: A sponge dab of fine glitter enhances the galaxy effect.
#4. Dreamy Lilac and Gold Celestial Nail Design
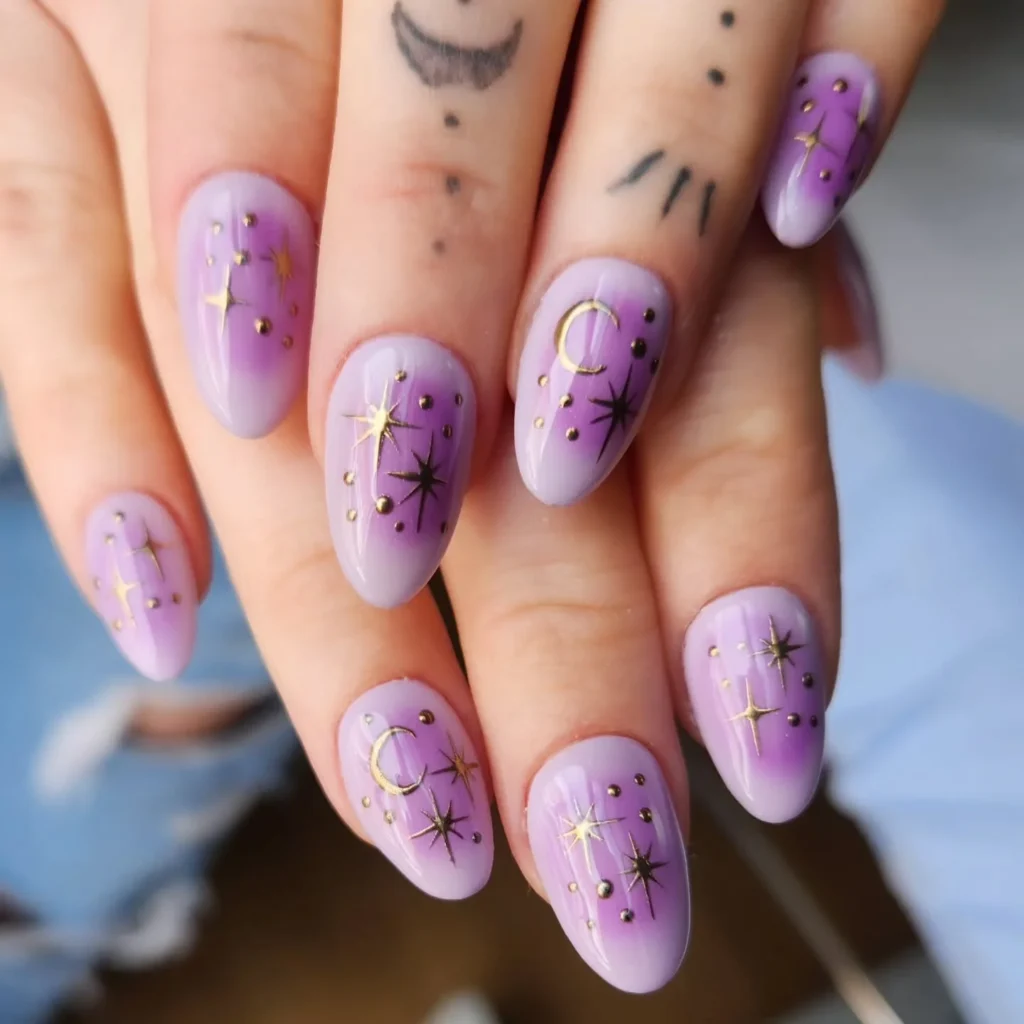
Picture a soft lilac sunset with tiny gold stars scattered across it. That’s exactly what this nail look captures. It’s calm yet magical like a little wish whispered into the night sky.
Recreate The Glam At Home:
- Apply a soft lilac polish as your base.
- Use gold nail stickers or decals to create celestial shapes.
- Add tiny dots with a gold detailing pen for extra sparkle.
- Apply a thin layer of top coat to lock the design.
Pro Tip: Keep designs minimal on a few nails for a more elegant balance.
#5. Subtle Lavender Gold Line Nail Style
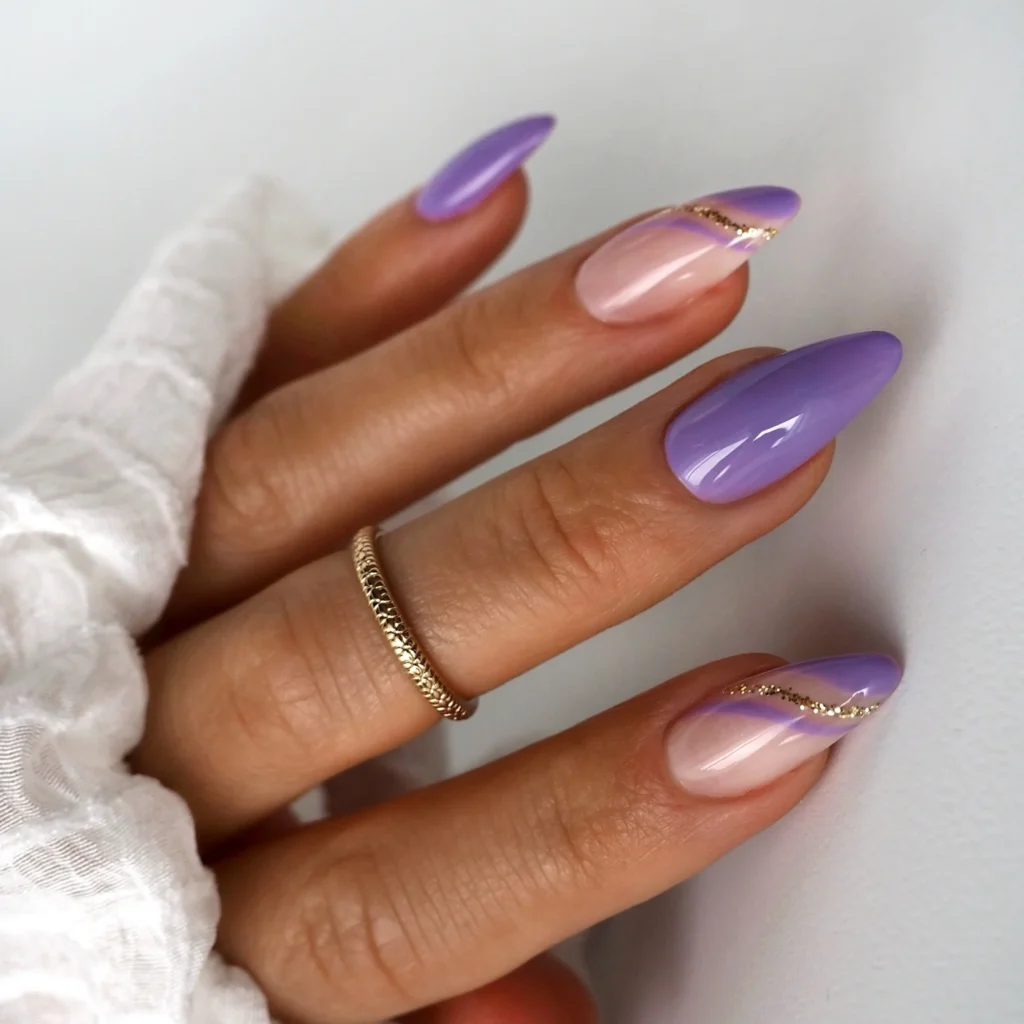
As soon as the top coat dried, I knew this one was a keeper. The minimalist gold curve across the lavender nails feels sleek and modern.
Get The Look Step By Step:
- Paint nails with a soft lavender base coat.
- Use a striping brush and gold polish to create curved lines diagonally.
- Let dry completely.
- Apply a glossy top coat to smooth the edges.
Pro Tip: Add a matte top coat for a chic, editorial finish.
#6. Cosmic Gold Moon Purple Nail Art
There’s something about this combo that feels otherworldly. The golden crescent moons against that deep violet shimmer nail polish make me think of midnight spells and candlelight.
Try This Chic Nail Style Yourself:
- Paint nails with deep purple gel polish.
- Use gold nail stickers or foil for moons and stars.
- Add small dots for extra shimmer using a dotting pen.
- Seal with two coats of glossy top coat.
Pro Tip: Cure each layer properly to keep gold accents smooth and crisp.
#7. Chic Purple Heart Gold Frame Nail Design
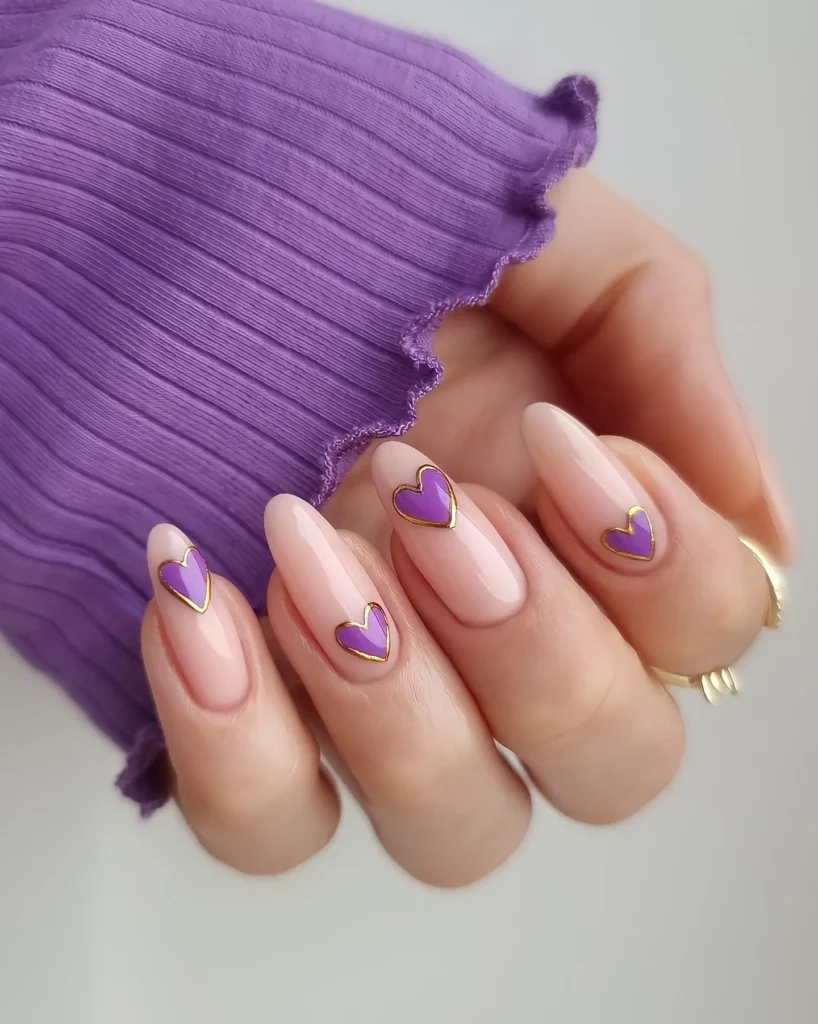
I can’t get enough of this one, the tiny purple hearts outlined in gold are just adorable. It’s giving soft romance meets high fashion.
Step Into The Look With These Tips:
- Apply a nude pink polish as the base.
- Paint small purple hearts in the center of each nail.
- Outline hearts carefully with metallic gold polish.
- Finish with a glossy top coat for a glass-like shine.
Pro Tip: Use a fine nail art brush for precise heart outlines.
#8. Marble Gold Accent Purple Nail Design
Whenever I wear designs like this, I feel a little extra confident. The marbled purple with gold veins feels artistic yet wearable.
Easy Steps To Copy The Style:
- Apply a pastel purple base coat.
- Use a thin brush dipped in white and gold to swirl marbled lines.
- Blend gently with a fine sponge.
- Add gold foil pieces on random spots.
- Seal it all with a glossy top coat.
Pro Tip: Less swirl gives a cleaner, more natural marble finish.
#9. Matte Royal Purple Gold Leaf Nail Art
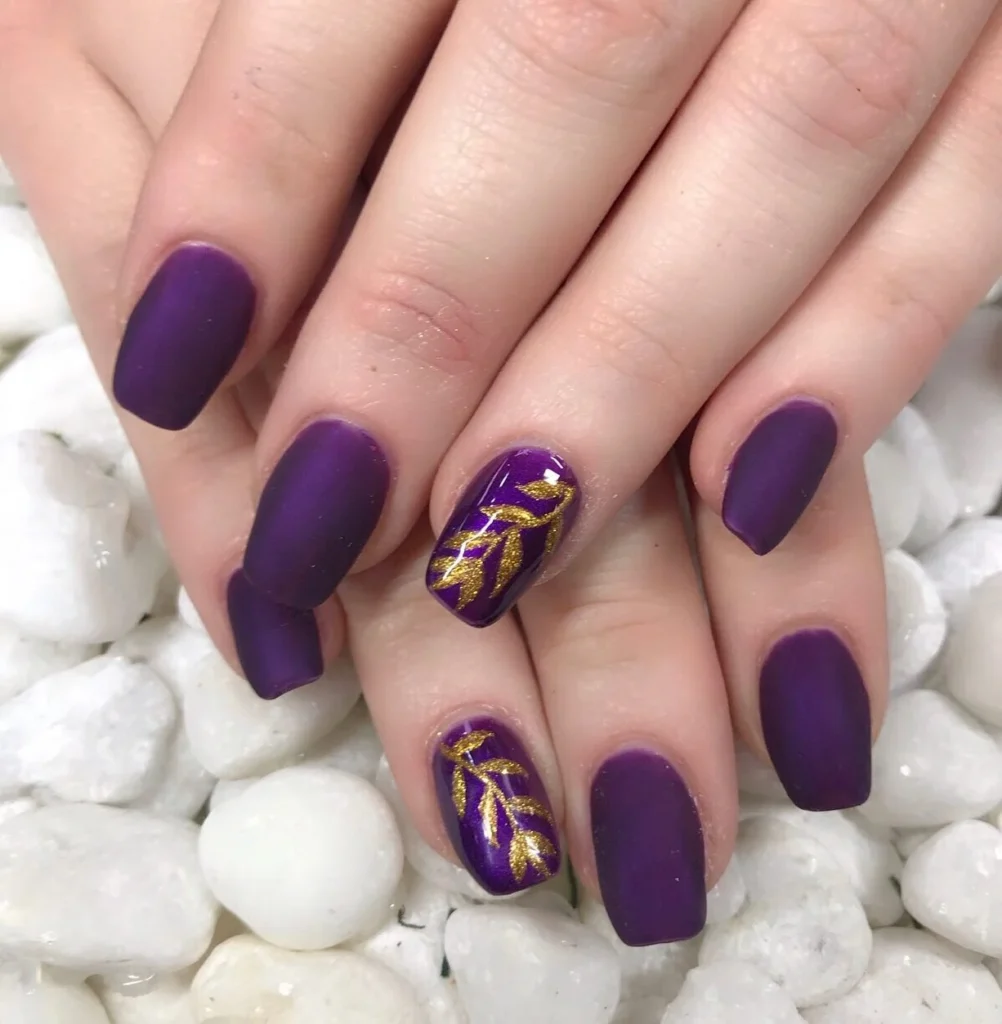
The matte finish gives this design such a powerful edge. The gold leaf details shimmer like tiny treasures against the velvet purple. It’s the perfect mix of bold and regal.
How To Recreate This Nail Look:
- Paint nails with a matte deep purple polish.
- Add gold leaf pieces to accent nails using a detail brush.
- Press gently before sealing with a thin top coat.
- Let dry fully for a flawless finish.
Pro Tip: Handle gold leaf with tweezers to avoid tearing it.
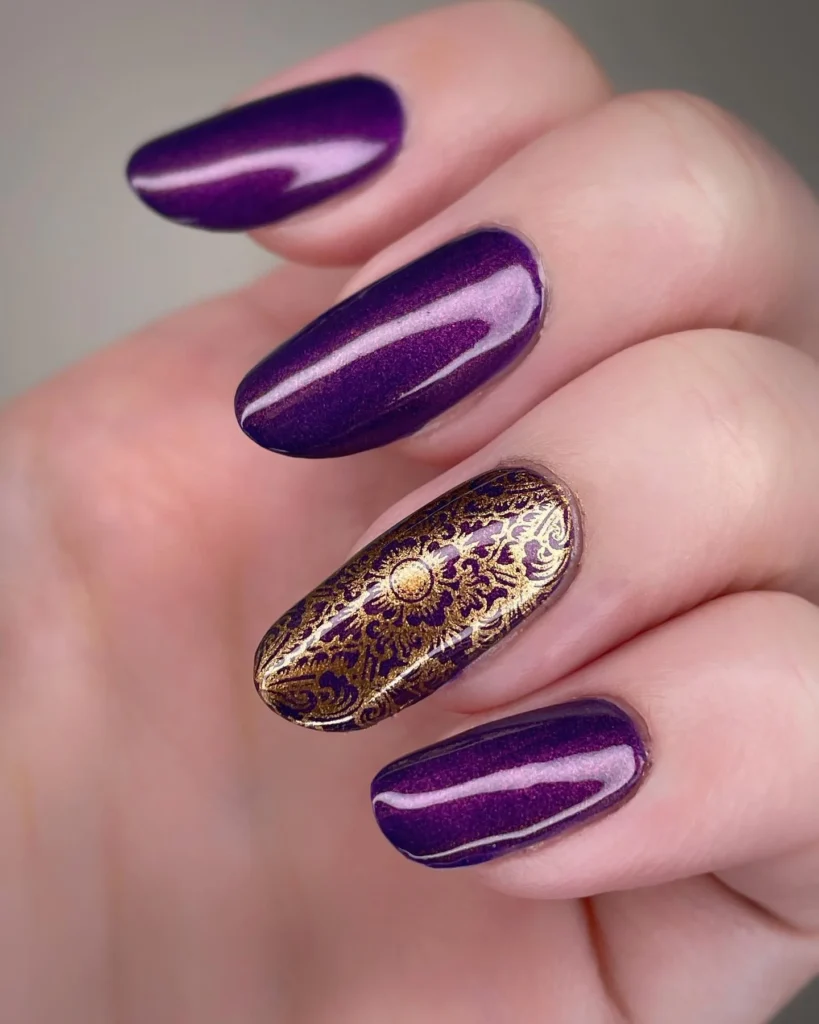
#10. Luxurious Gold Patterned Purple Nail Design
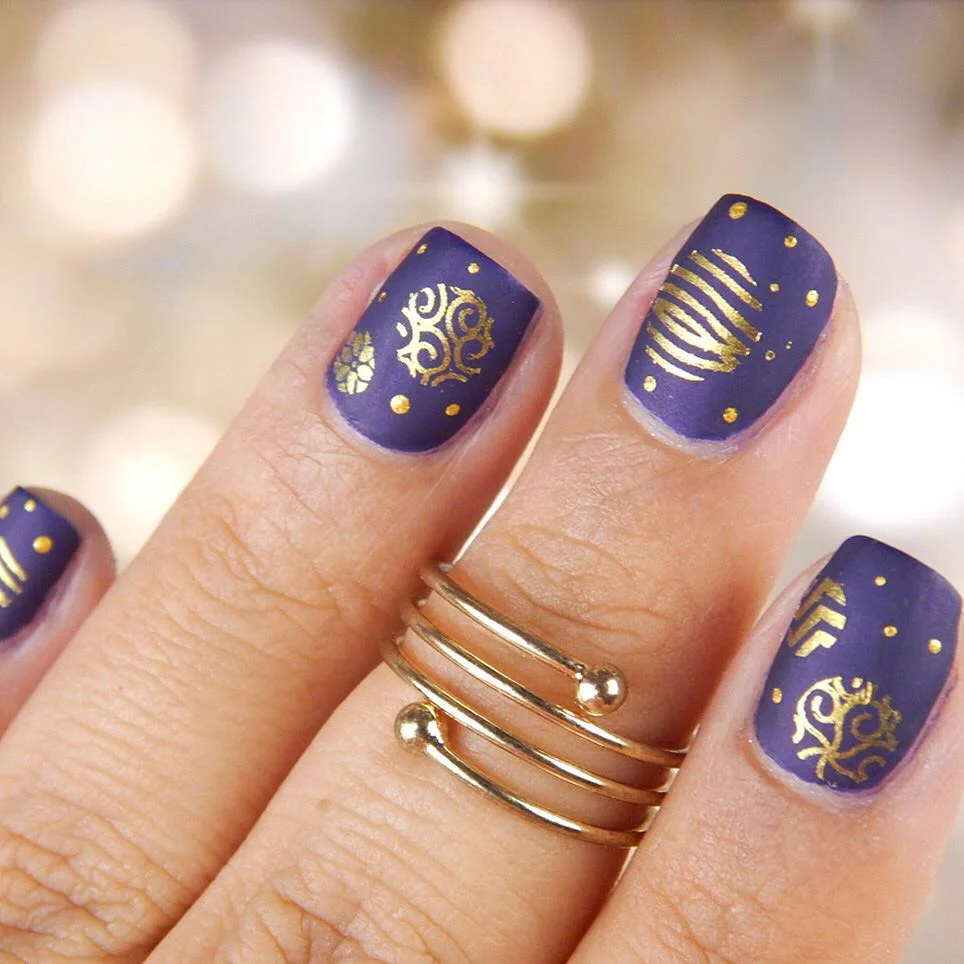
Friends keep asking where I got this nail art done, that’s how good it looks. The intricate gold patterns on rich purple create pure luxury vibes.
Steps To Nail This Design:
- Apply two coats of deep plum polish.
- Use gold stamping plates or stencils for patterns.
- Gently press the design onto each nail.
- Finish with a matte top coat for high-end texture.
Pro Tip: Clean the stamping plate after each use for sharper prints.
#11. Twilight Leaf Purple and Gold Nail Art
The contrast of deep violet and shimmering gold brings such warmth. I’d call this look elegant nature, sophisticated with a whisper of wild beauty.
How To Recreate This Nail Look:
- Paint nails with a gradient of lavender and deep purple polish.
- Use gold foil or metallic paint to draw fine leaf motifs.
- Add purple accents within the leaves for depth.
- Seal the look with a glossy top coat.
Pro Tip: Use a thin liner brush to make each leaf delicate and defined.
#12. Regal Baroque Purple Nail Design
This design looks like it was made for royalty. The gold filigree detailing over that rich purple base feels like something out of a vintage palace painting.
Steps To Nail This Design:
- Start with two coats of metallic purple polish.
- Use a gold stamping plate or freehand pattern for the baroque accents.
- Gently stamp or paint the design on one or two nails.
- Add a glossy top coat for a reflective finish.
Pro Tip: Apply thin polish layers to keep stamped designs crisp.
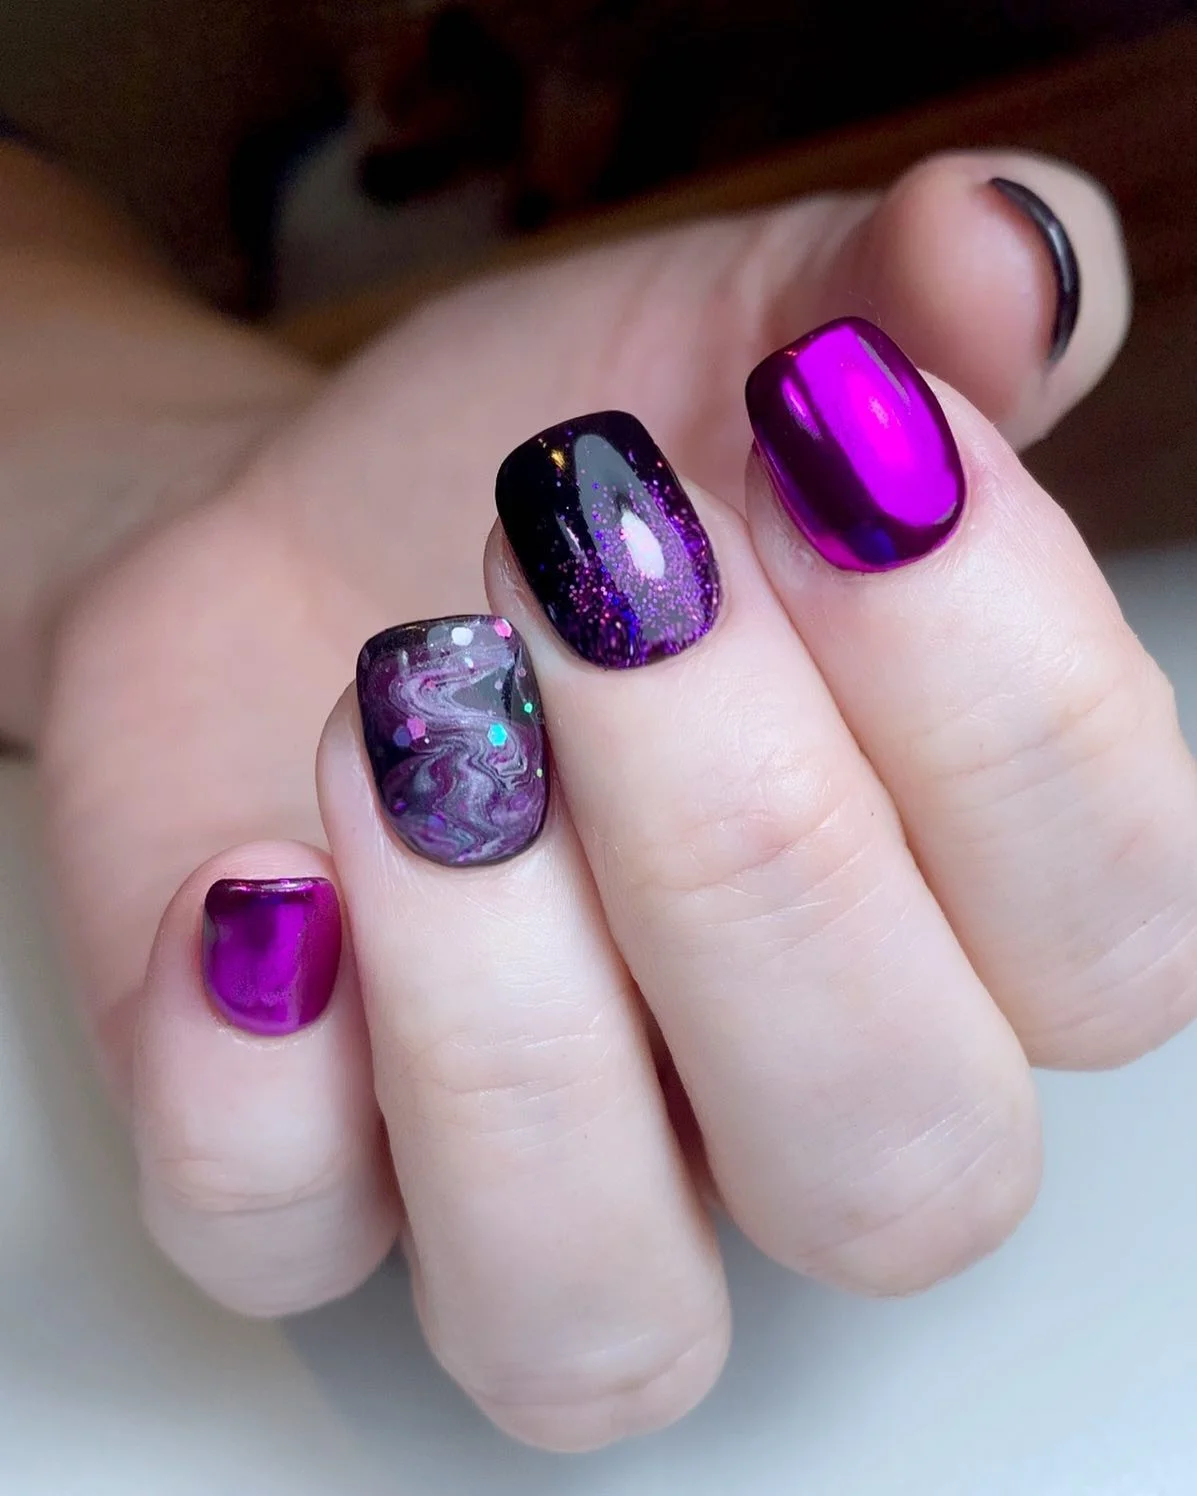
#13. Luxe Glitter Swirl Purple Nail Glam
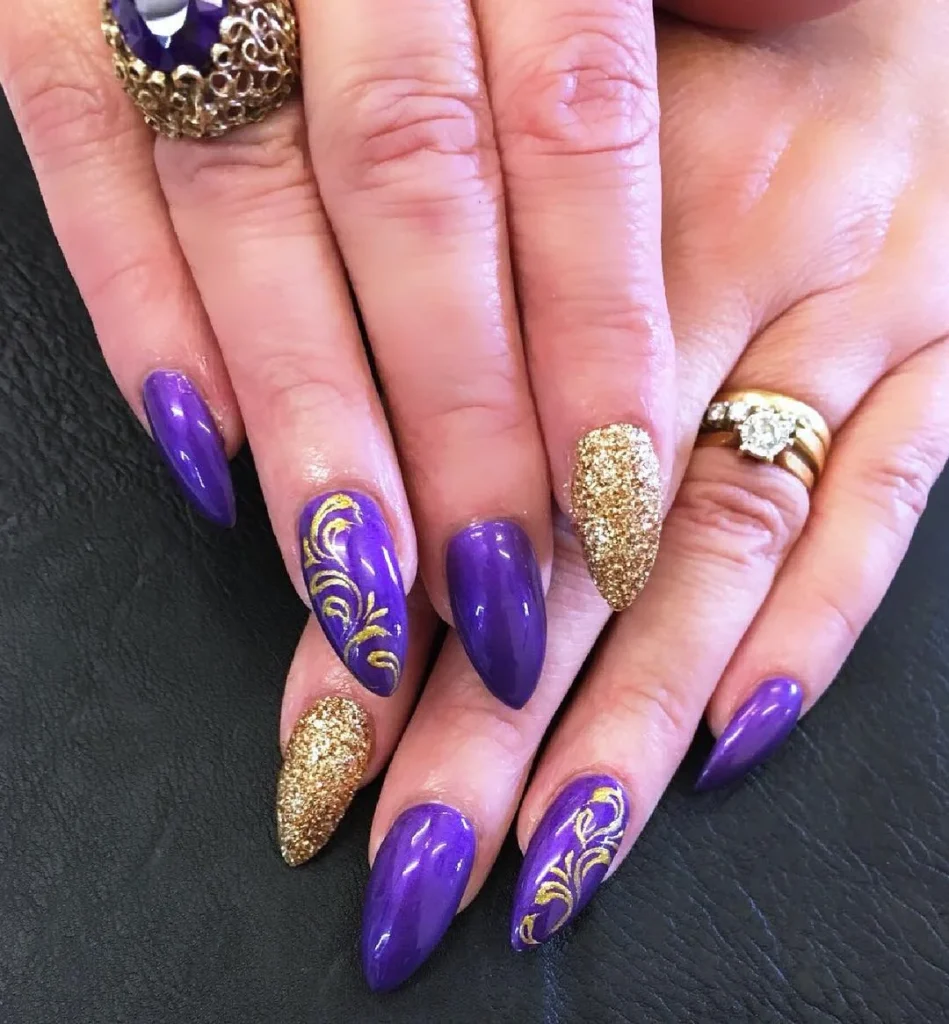
As soon as I saw the mix of gold glitter and royal purple, I was obsessed. The swirl patterns add movement and drama like a sparkle caught mid-dance.
DIY Guide Achieving The Look:
- Apply a protective base coat.
- Paint two nails in gold glitter and the rest in glossy purple.
- Use a thin brush and gold polish to create curved swirl lines.
- Seal with a glossy top coat for shine and durability.
Pro Tip: Alternate glitter and solid nails for a balanced statement.
#14. Cosmic Marble Purple and Gold Nail Design
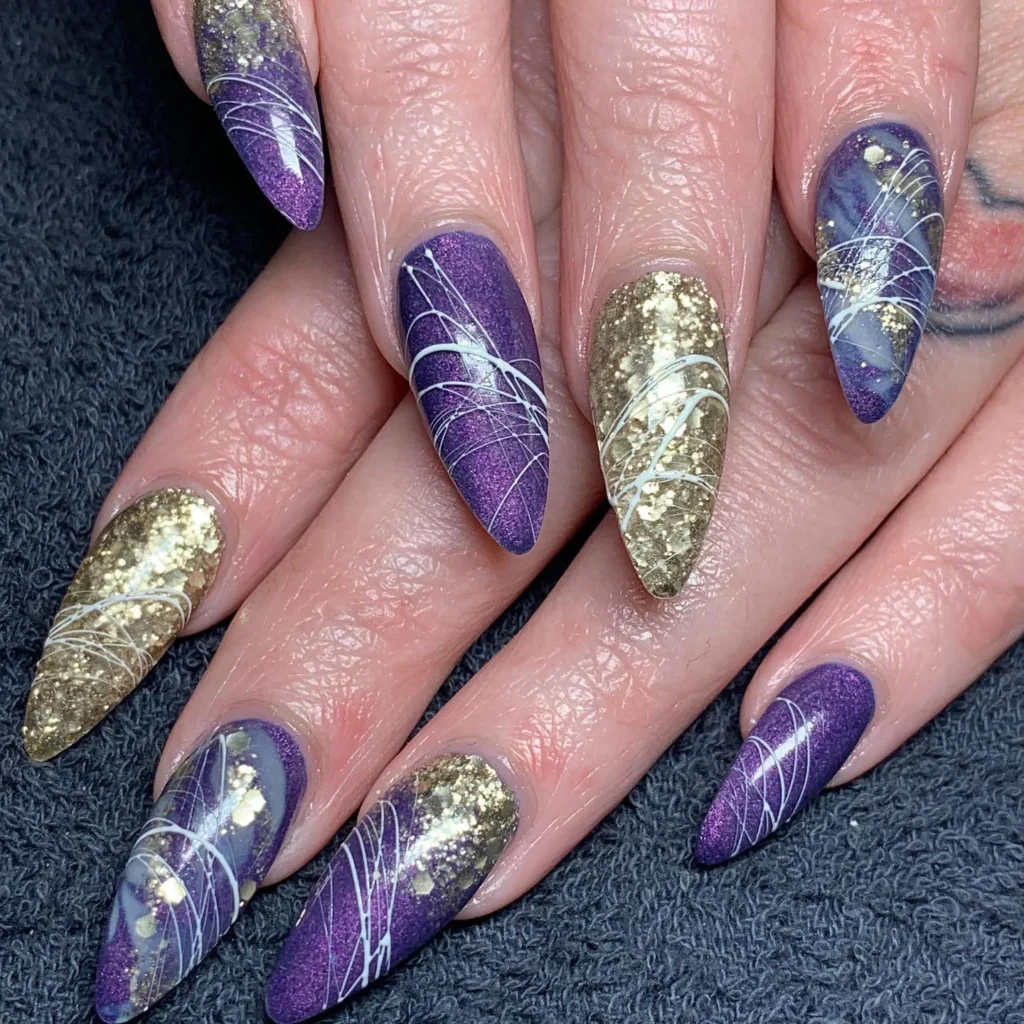
This one feels like wearable art. The combination of marbled purple, white streaks, and gold foil looks celestial almost like lightning across a velvet night.
Recreate The Glam At Home:
- Paint nails with deep purple polish.
- While wet, swirl in white polish using a thin brush.
- Add gold glitter near the tips for dimension.
- Finish with a high-gloss top coat.
Pro Tip: Work fast with marbling, it blends best while still wet.
#15. Electric Gold Vein Purple Nail Art
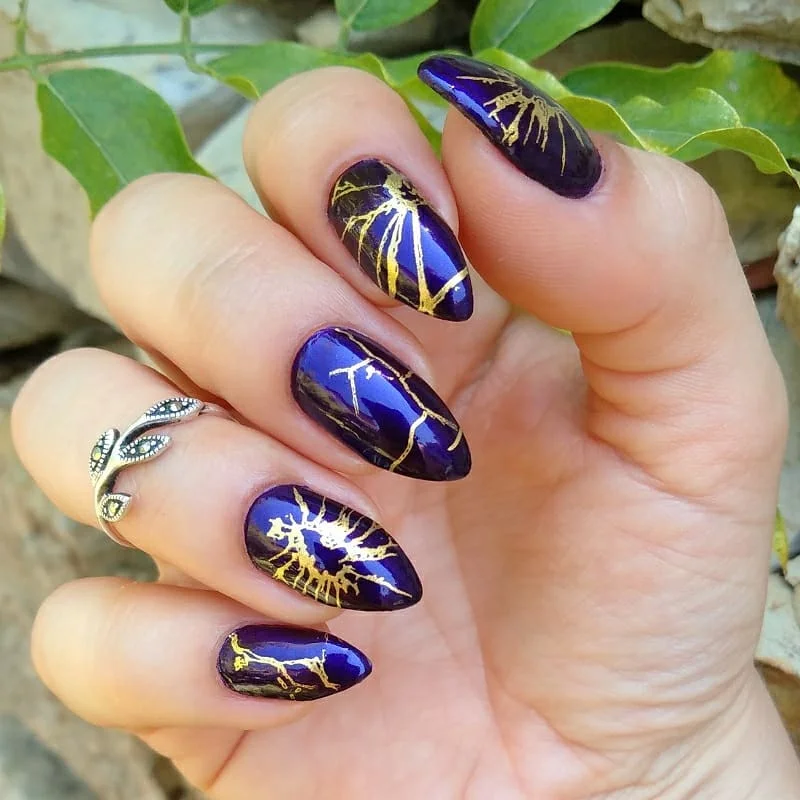
These nails remind me of lightning striking through royal silk. The deep indigo base and gold crack design create a fierce yet elegant vibe.
Try This Chic Nail Style Yourself:
- Apply a dark purple base coat.
- Use gold chrome polish or foil to create thin vein-like cracks.
- Add a second layer for extra texture.
- Seal with a glossy top coat for shine.
Pro Tip: Use a fine detailing brush for more natural-looking vein lines.

Olivia Tran is the founder and creative force behind TheNailDesigns.