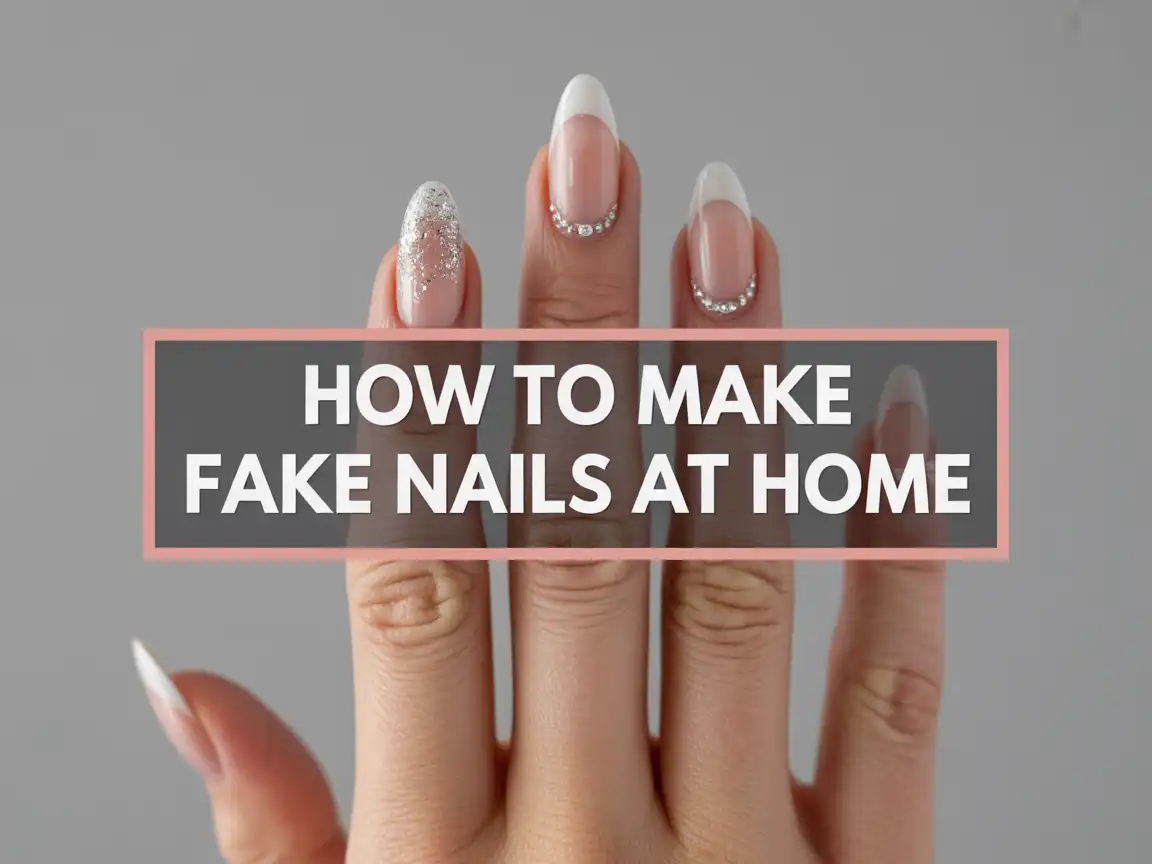
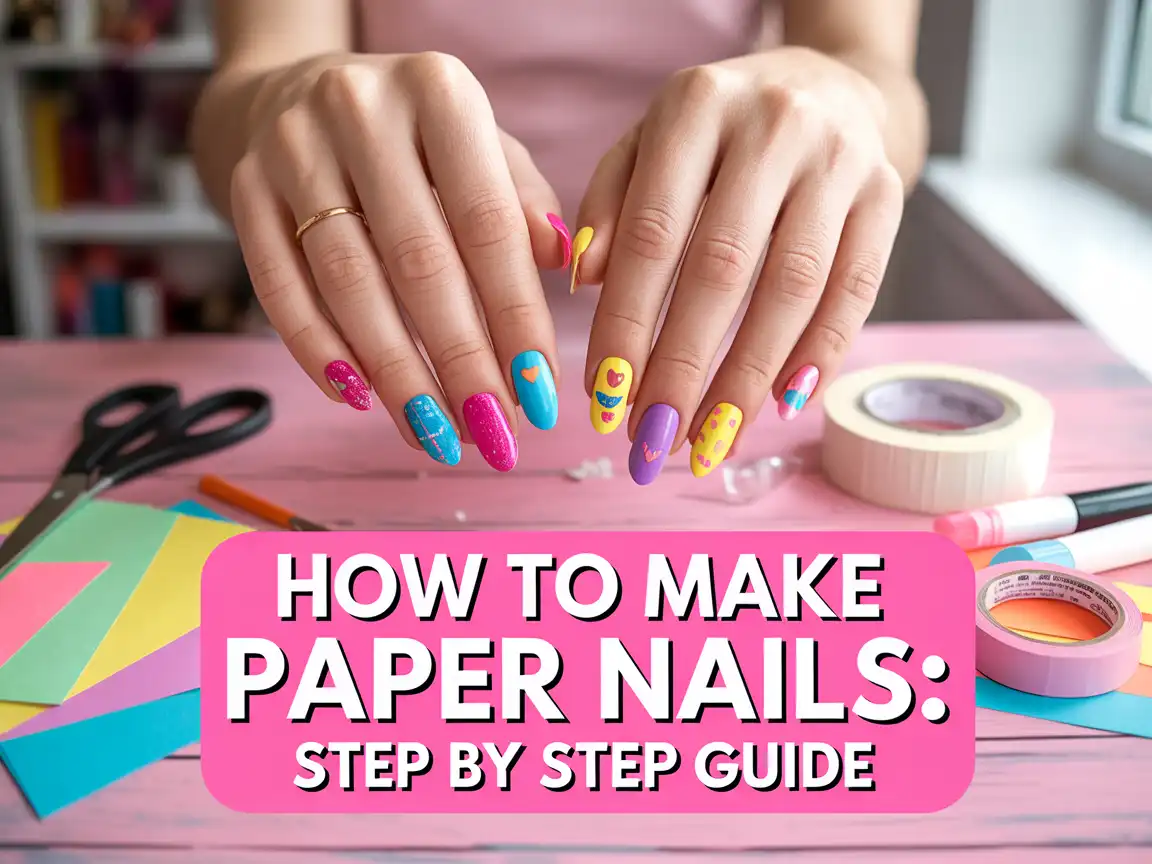
How to make paper nails: Step by step Guide
Okay, hear me out, paper nails look ridiculous in the best way. You get long, dramatic nails without spending money, without glue fumes taking over your room, and without committing to anything permanent. Plus, you can make them neon, glittery, spooky, classy… whatever vibe you wake up with.
I first tried this “crafty nail” thing when I wanted long nails for a photo and didn’t want to deal with press-ons. I expected a mess. I got surprisingly cute results… and a tiny ego boost.
So let’s walk through How to make paper nails: Step by step Guide style, like we’re hanging out and crafting at the same table.
What are paper nails (and why do people love them)?
Paper nails work like DIY fake nails made from paper shapes you fold, wrap, and secure around your fingertips. You can wear them for photos, short videos, cosplay, pretend play, or just for fun when boredom hits. You won’t wash dishes in them, obviously, unless you enjoy chaos.
Paper nails shine because they feel cheap, quick, and creative. You can finish a full set in under an hour once you get the hang of it. Ever wanted to try a wild nail shape without committing to acrylics? Paper nails let you test-drive the drama.
When paper nails work best
Paper nails fit these moments perfectly:
- Photoshoots and selfies
- Cosplay and costumes
- Kids’ craft time
- Nail art practice
- Content creation
Paper nails give you the look without the commitment. That’s the whole vibe.
What you need to make paper nails at home
You don’t need fancy supplies. You just need a few basics and a little patience. I recommend grabbing everything first so you don’t stop mid-nail and panic-search for tape.
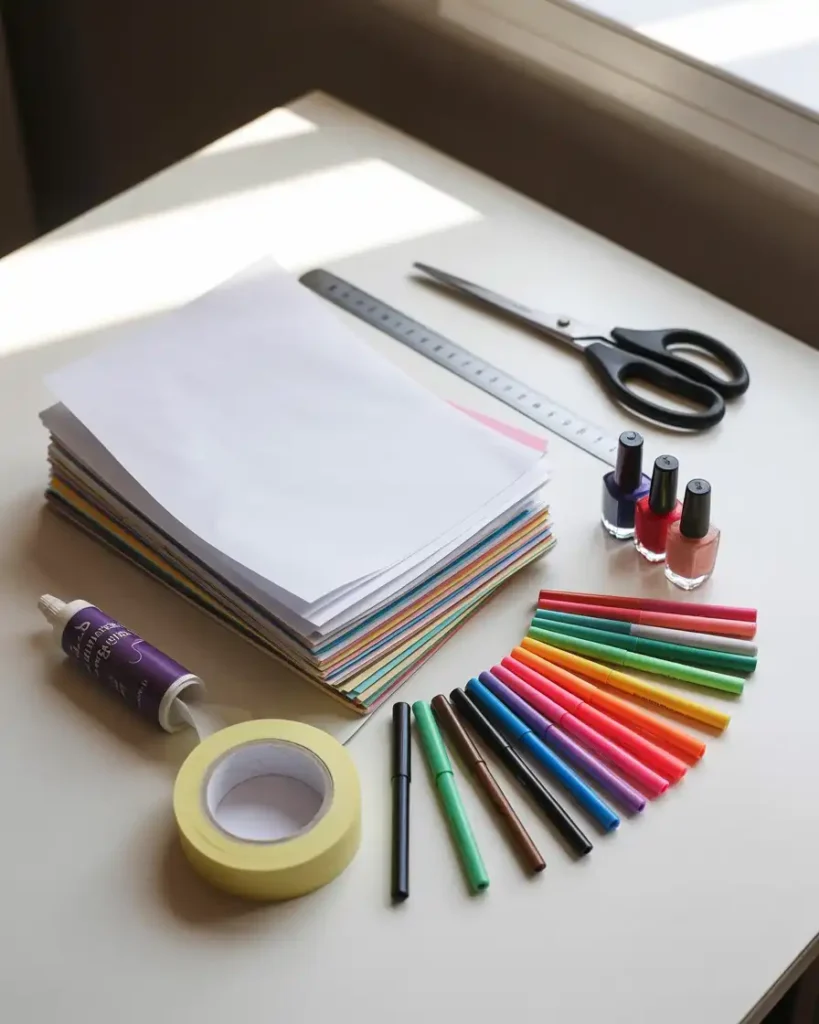
Supplies checklist
Here’s what I use:
- Paper (printer paper, cardstock, or construction paper)
- Scissors
- Tape (clear tape works best)
- Glue stick or craft glue (optional)
- Markers or colored pens
- Nail polish (optional, for extra glam)
- Ruler (optional, for neat shapes)
If you want stronger nails, choose cardstock. If you want easy folding, choose printer paper.
Quick comparison: printer paper vs cardstock
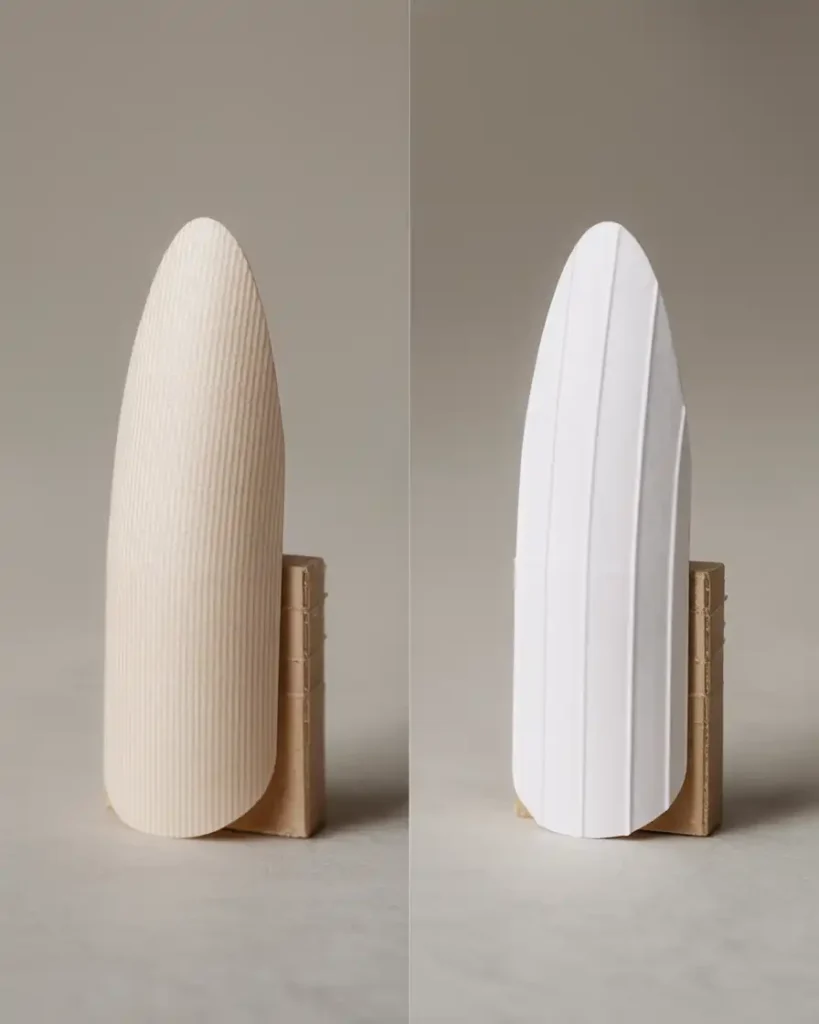
I’ve tried both, and each has a personality:
- Printer paper: easier to fold, lighter, more flexible
- Cardstock: stronger, holds shape better, feels more “nail-like”
IMO, printer paper works better for your first attempt. Cardstock feels better once you understand the folding.
Pick your paper nail style before you start
You can make paper nails in a few different ways. Some styles look more realistic, and some styles look more artsy. Pick one method and stick with it for the first set.
Popular paper nail styles
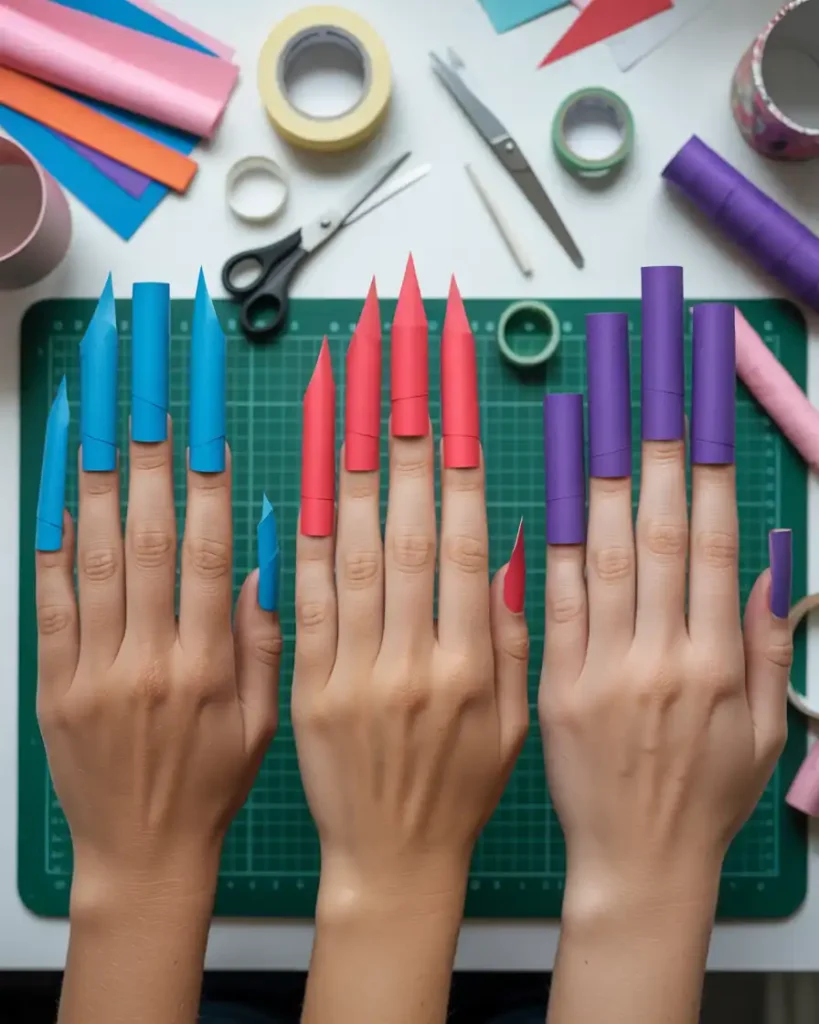
These options give you different looks:
- Wrap nails: easiest, great for beginners
- Folded tip nails: stronger, cleaner shape
- Tube nails: look dramatic, take more effort
For this guide, I’ll show you the wrap + folded tip method because it looks good and stays wearable.
Step-by-step guide: How to make paper nails that actually stay on
Let’s get into the main tutorial. I’ll walk you through it nail by nail. You’ll get better after the first two, so don’t judge your whole life based on your first paper nail.
Step 1: Measure your nail size with a paper strip
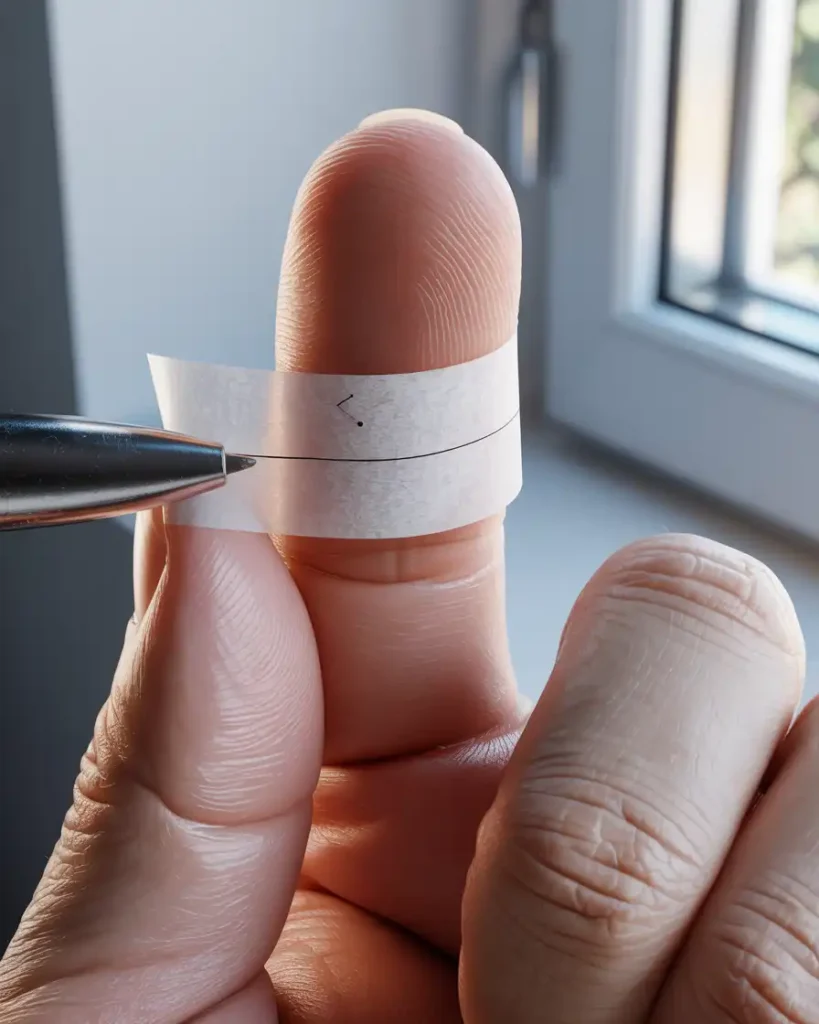
Cut a thin strip of paper about 1–2 cm wide. Wrap it around the tip of your finger where your natural nail sits. Mark where the strip overlaps.
This step helps you avoid nails that slide off like tiny hats. Ever made something “one size fits all” and then it fits nobody? Yeah, don’t do that here.
Your paper nail fits best when you measure your finger first.
Step 2: Cut a basic nail shape
Use your strip measurement to cut a rectangle that wraps around your fingertip. Then shape the top into your nail style.
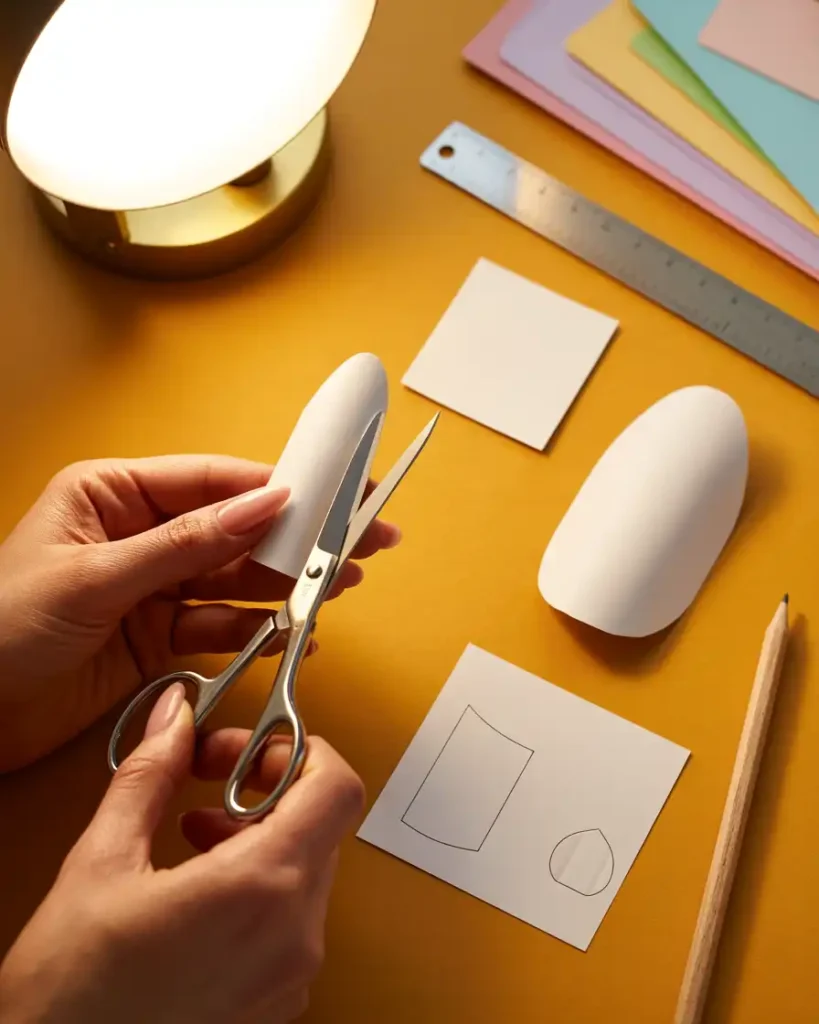
Try these simple shapes:
- Square: flat top edge
- Oval: rounded top edge
- Almond: tapered sides with a rounded tip
I suggest squoval or oval for beginners because they hide small mistakes. Almond looks cute but punishes uneven cutting.
Step 3: Create a fold line for the nail “bed”
Place the paper piece on your finger and mark where your natural nail starts. Fold the paper slightly at that mark to create a “ledge” that sits along your nail bed.
That fold gives the nail structure. It also keeps the paper from flopping around like a sad flag.
The fold line makes the paper nail look cleaner and feel sturdier.
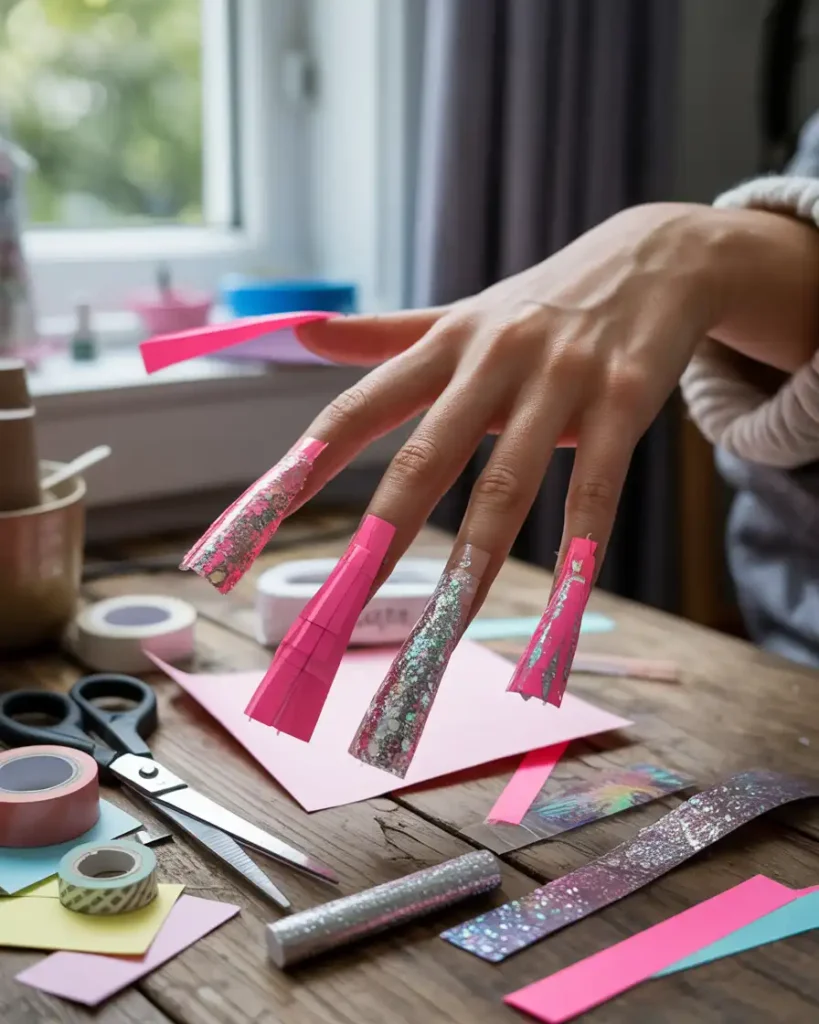
Step 4: Wrap the paper around your fingertip
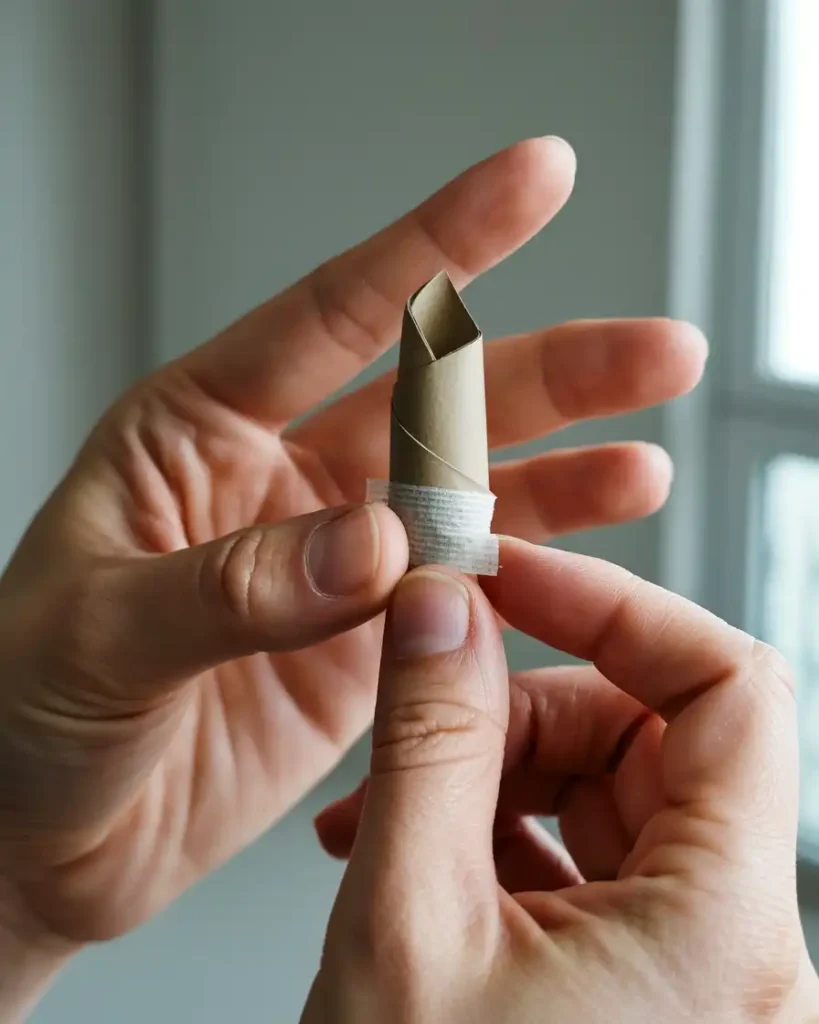
Wrap the paper around your fingertip so the fold line sits right above your natural nail. Keep it snug but comfortable.
Then secure the overlap with a small piece of tape on the underside. You want the tape hidden so the nail looks neat from the top.
Step 5: Secure the nail on your natural nail area
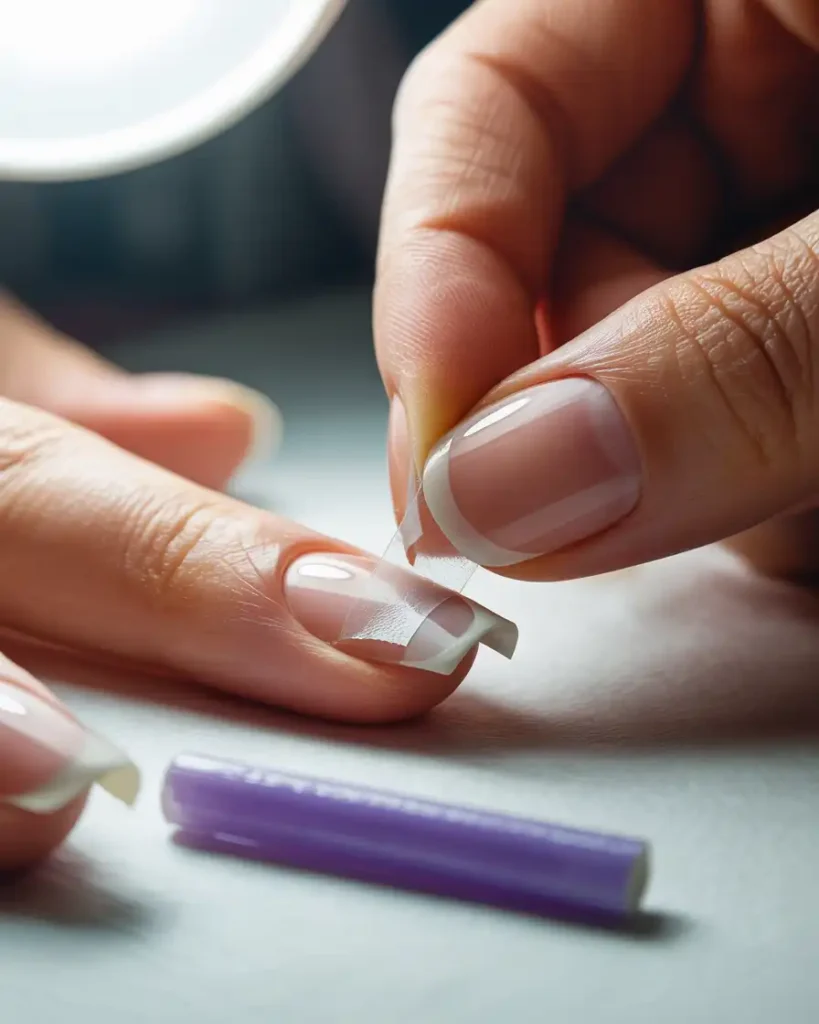
Now tape the nail to your actual nail area. Place a small strip of tape across the fold line and press it down firmly.
You can also use a glue stick here, but I prefer tape because I remove it easily. FYI, glue works better for longer wear, but tape wins for quick fun.
Tape gives you fast hold without drama.
Step 6: Shape and refine the tip
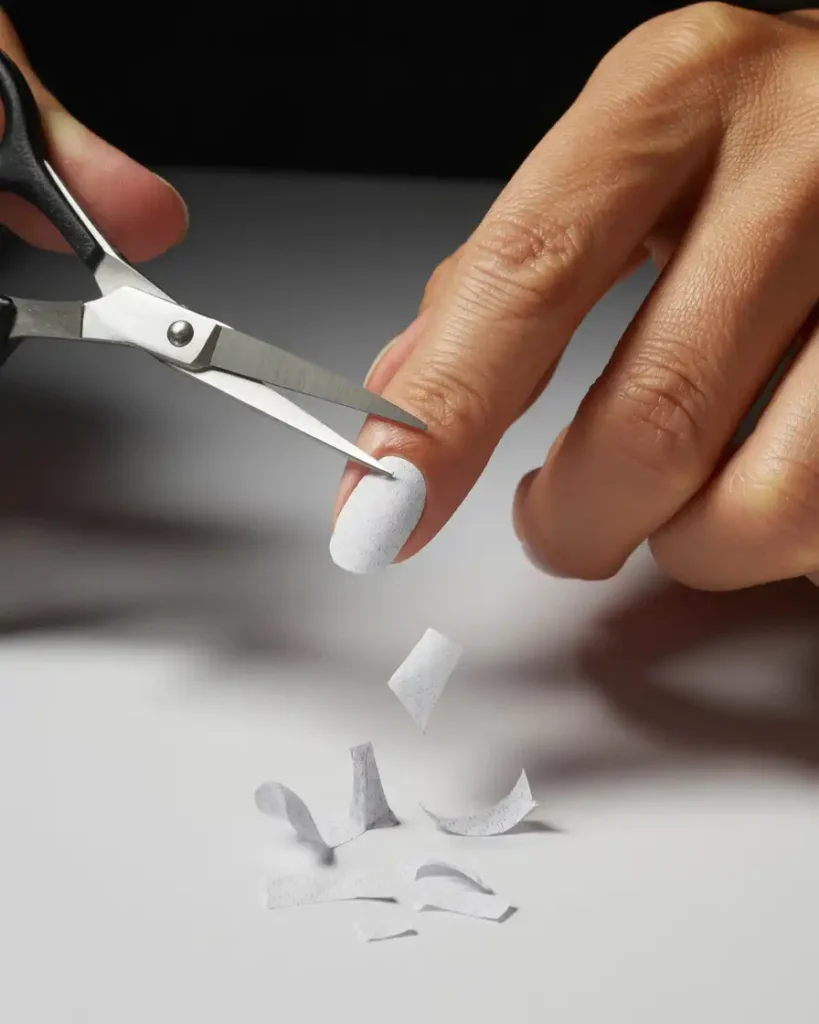
Once you attach the nail, you can trim and shape the tip while it sits on your finger. That trick helps you match the angle to your fingertip.
I trim tiny pieces at a time. I avoid big cuts because one wrong snip turns “almond” into “tooth.”
Step 7: Repeat for all fingers
Make one nail, then use it as your template. Cut the next paper pieces to match.
You’ll save time and keep your set consistent. Do you want one nail to look like a dagger and another to look like a baby spoon? Probably not.
How to make paper nails stronger so they don’t flop
Paper nails can look amazing, but they can also bend if you use thin paper or skip reinforcement. You can fix that with a few easy tricks.
Strength trick 1: Double-layer your paper
Cut two identical nail shapes and glue them together. Let them dry for a minute before you wrap them.
This method adds strength fast. It also makes the nail feel more like a press-on.
Strength trick 2: Add a “spine” fold
Fold a tiny ridge down the center of the nail lengthwise. That fold works like a spine.
You’ll notice less bending and a cleaner shape. Ever wondered why some crafts hold structure better? Folds do that magic.
Strength trick 3: Use clear tape as a top coat
Place a strip of clear tape across the top of the nail. Smooth it down and trim the excess.
Tape acts like a protective layer. It also adds shine, which makes the nail look more “real.”
A top tape layer makes paper nails smoother, shinier, and tougher.
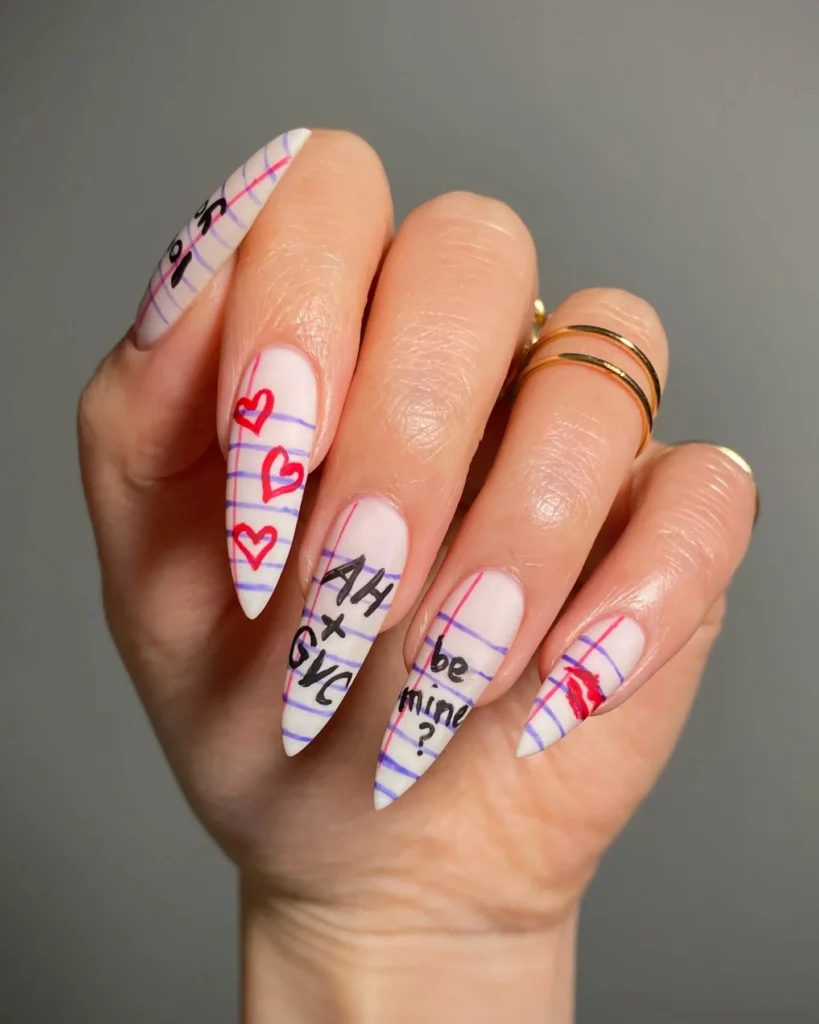
Decorating paper nails: make them look cute, not crafty
Plain paper nails look fine, but decorated paper nails look amazing. This part lets you show personality and experiment with styles you’d never try on real nails.
Easy decoration ideas
Try any of these:
- Draw French tips with a white marker
- Add glitter polish lightly
- Use markers for ombré shading
- Create cute patterns like hearts, stars, or swirls
- Add tiny stickers if you have them
I like drawing a simple French tip because it instantly looks polished. Yes, it also makes me feel classy even if I wear pajamas.
Quick tip: use a base color first
Color the paper before you attach the nail. That gives you cleaner edges and less mess.
If you color after attaching, you risk smudging on your skin. And then you walk around looking like you fought a marker.
Best paper nail shapes for beginners
Some shapes forgive mistakes. Some shapes expose every tiny uneven edge. If you want a smooth first attempt, pick a forgiving shape.
Beginner-friendly shapes
Start here:
- Oval: soft edges, easy to cut
- Squoval: neat and practical
- Short almond: cute, but keep it short
Avoid long sharp nails on your first try. You’ll poke yourself and feel betrayed by your own craft project.
Shorter paper nails look cleaner and last longer.
Common paper nail mistakes (and quick fixes)
You’ll run into a few classic issues. Don’t stress. You can fix almost all of them with small adjustments.
Problem: The nail slips off
You need a tighter wrap and better tape placement. Use a slightly smaller rectangle and tape under the finger for grip.
Problem: The nail bends too easily
Use cardstock, double-layer the paper, or add the center fold spine. Those changes stiffen the nail fast.
Problem: The nail looks crooked
Cut a new one and use the first nail as a template. You can also trim the tip while the nail sits on your finger to match angles.
Problem: Tape shows on top
Move tape to the underside or use smaller pieces. Clear tape helps, but hidden tape looks best.
Small fixes make paper nails look surprisingly professional.
How long do paper nails last?
Paper nails last anywhere from 10 minutes to a few hours, depending on how careful you act. If you treat them like real nails, they can stay on longer. If you start opening bags and doing chores, they’ll quit immediately.
I use them for photos, quick videos, and fun crafts. I remove them before I do anything messy. Paper nails hate water, and they hate friction.
If you want longer wear
Try these upgrades:
- Use cardstock
- Add double layers
- Use strong tape or mild craft glue
- Keep nails shorter
Safety and comfort tips (because we like fun without pain)
Paper nails shouldn’t hurt. If they hurt, you wrapped them too tight or placed tape awkwardly. You want snug, not strangled.
Comfort rules I follow
I keep these rules every time:
- I avoid wrapping paper too tight
- I never tape across skin too aggressively
- I remove nails gently and slowly
- I stop if my finger feels numb or irritated
Comfort always matters more than “perfect” nails. Your fingers deserve respect.
Fun variations: level up your paper nails
Once you master the basic method, you can try extra styles. These variations look cool and help you experiment.
Origami-style folded nails
You can fold tiny triangles and layers to make sharp, edgy nails. This style looks dramatic for cosplay or costume nails.
Press-on style paper nails
You can cut nail shapes that sit on top of your nail and tape them at the base. That method looks clean, but it needs stronger paper.
3D nail art effects
You can create raised designs with folded paper shapes. You can glue tiny hearts, spikes, or bows onto the nail surface.
Yes, you can absolutely build a tiny fashion runway on your fingertips. Humans amaze me.
Conclusion: paper nails give you big nail energy with zero commitment
You can create fun, stylish nails with nothing but paper, scissors, and tape. You measure, cut, fold, wrap, secure, and decorate. You also get to experiment with shapes and designs without risking your real nails.
So, are you making cute short squovals, elegant ovals, or dramatic almond claws first? Try one set, snap a photo, and enjoy the vibe because sometimes you just need a little craft chaos to brighten the day.

Olivia Tran is the founder and creative force behind TheNailDesigns.